Shop this story
Guide to Nail Art: Mastering the Art of Nails
Table of Contents
ToggleIntroduction To Our Guide To Nail Art
Nail art is a beauty statement and a creative outlet for many.
It’s the canvas on your fingers, a way to express personality and style.
From the simplicity of a French manicure to the complexity of 3D designs, nail art has evolved into a form of self-expression that mirrors fashion and art trends.
This is our ultimate Guide to Nail Art!
Guide to Nail Art: Techniques
Stamping

Stamping is a nail art technique that involves transferring designs from a stamping plate to the nails using a special stamper and polish. It’s a favourite because it produces intricate and consistent patterns easily and quickly. Stamping can add a professional touch to a manicure, allowing for endless creativity by combining different designs and polished colours.
How to Stamp Nails
One typically starts with clean, prepped nails and a base coat of polish to stamp nails. A design is chosen from a stamping plate, and a specific stamping polish is applied. The excess polish is swiped off using a scraper, leaving only the design filled with polish. A stamper is then rolled over the design to pick it up and quickly stamped onto the nail, transferring the pattern. The design is then sealed with a top coat for durability.
Stamping Kits
A stamping kit is a set that usually includes one or more stamping plates with various engraved designs, a silicone or rubber stamper, a scraper to remove excess polish, and sometimes, stamping polishes. These kits provide the essential tools needed for stamping and are available in varying complexities, from beginner-friendly to professional-grade options. The quality of the tools can significantly affect the precision and clarity of the stamped designs.
Marbling

Marbling is a nail art technique that creates a multi-coloured pattern on the nails, resembling the swirled patterns of natural marble. This technique involves dropping nail polish into water or directly onto the nail and manipulating the colours to create a marbled effect. It’s celebrated for its uniqueness, with each nail offering a different design, and is perfect for those looking to add a splash of colour and artistry to their nails.
Water Marbling
Water marbling is a technique where drops of nail polish are added to water, creating a polish film on the surface. A tool is then used to swirl the colours together to create a marbled design. The nail is dipped into the design, which transfers onto the nail. This method requires practice to master the timing and swirling technique, but the results are often stunning and intricate.
Dry Marbling
Dry marbling, also known as drag marbling, is an alternative to water marbling that doesn’t require water. Polish is applied directly onto the nail or a surface, adding another colour. While the polish is still wet, a pointed tool swirls the colours together, creating a marbled effect. This technique offers more control than water marbling and is less messy, making it a convenient option for those new to nail art.
Dotting

Dotting in nail art is a technique to create patterns and designs of dots. It’s a versatile method ranging from simple polka dots to complex dotted images and textures. Depending on the design and colours, Dotting can add a playful or sophisticated touch to manicures, making it suitable for casual wear or special occasions.
Dotting Tools
Dotting tools are specialised implements designed for nail art to create dots of various sizes. They typically have a small, rounded tip that, when dipped in nail polish, makes a perfect dot on the nail. These tools often come in sets of different sizes for versatility in design, allowing for the creation of fine details and larger circular patterns. Their ease of use makes them a staple in nail art kits for beginners and experienced nail artists.
Dotting Patterns
Dotting patterns are designs made using dotting tools. These patterns can range from simple arrangements, like evenly spaced dots forming lines or flowers, to more elaborate compositions that layer dots for a 3D effect or use varying dot sizes for shading and depth. The patterns can be random or precisely geometric, offering a broad scope for creativity and personalisation in nail art designs.
Airbrushing

Airbrushing is a sophisticated nail art technique that uses a small airbrush to spray nail colour onto the nails. It allows for smooth gradients and a seamless blend of colours, ideal for creating backgrounds, ombres, and detailed graphic designs. Airbrushed nails can exhibit finesse and detail that’s difficult to achieve with traditional nail polish application methods.
Airbrush Kits
An airbrush kit for nail art typically includes an airbrush gun, a compressor, and a selection of airbrush-ready nail colours. These kits may also include stencils and masks, enabling the artist to create precise shapes, lines, and patterns. A good airbrush kit can be valuable for nail technicians who want to offer their clients a wide range of creative and customised nail designs.
Airbrushing Techniques
Airbrushing techniques in nail art involve controlling the flow and spread of the colour as it’s sprayed onto the nail. Mastery of these techniques can allow for the creation of smooth colour transitions, detailed pictorial designs, or stencilled patterns. Techniques can vary from the basics of layering and shading to more advanced methods, such as creating airbrushed decals or using mixed media elements. Airbrushing requires a steady hand, precision, and practice to produce consistent results.
Ombre

Ombre in nail art refers to a gradient effect where colours blend seamlessly into each other on the nail, typically transitioning from lighter to darker shades or one colour to another. This technique creates a striking visual effect that can range from subtle and natural to bold and dramatic, making it a popular choice for those looking to add a touch of elegance and depth to their manicure.
Ombre Techniques
Various techniques can be used to achieve the ombre effect. One standard method involves applying a base coat of the lightest colour and then using a makeup sponge to dab on the gradient of colours, blending them where they meet on the nail. Another approach is to use an airbrush for a finer, more diffused look. Ombre techniques require some practice to perfect the smooth transition of colours, but the outcome is often worth the effort.
Ombre Colour Combinations
Choosing the right ombre colour combinations can enhance the overall aesthetic of the nail design. Classic combinations include a single colour fading from light to dark or complementary colours from the same family blending. Contrasting colours or rainbow palettes can be used for a more striking look. The key is to ensure the colours blend well to create the desired gradient effect.
Guide to Nail Art: Materials
In nail art, materials are the foundation of any design. To achieve the desired look, nail artists offer a variety of textures, finishes, and effects.
The choice of materials can vastly influence the manicure’s outcome and durability, making it essential to select high-quality options that align with the intended design concept.
Nail Polish
 Nail polish is the most fundamental material in nail art. It is used to colour the nails and create designs. It comes in countless shades and finishes, from matte, gloss, and satin to textured, glitter, and metallic. Nail polish serves as a base colour and a medium for artistic expression on the nails.
Types of Nail Polish
There are various types of nail polish, each with unique characteristics. Traditional lacquers dry by evaporation, while gel polishes cure under UV or LED light and offer a longer-lasting finish. Speciality polishes like crackle, magnetic, or mood polishes change colour or texture, adding an element of surprise and innovation to nail designs.
Nail Polish Brands
Nail polish brands range from drugstore staples to luxury names, each offering a different spectrum of colours, formulas, and price points. Some brands are lauded for pioneering recipes, eco-friendly options, or fashion-forward colours. Choosing the right brand often depends on personal preference, budget, and the specific requirements of the nail art design.
Gel
 Gel is a trendy nail art material known for its glossy finish and durability. It’s a type of nail enhancement that comes in pre-mixed polish formulas and requires curing under a UV or LED lamp. Gels are favoured for their flexibility, protection for the natural nail, long-lasting shine, and resistance to chipping.
Gel vs Acrylic
The debate between gel and acrylic often revolves around the durability and application process. Acrylics combine a liquid monomer and a powder polymer, creating a hard protective layer over the natural nail when air-dried. Gels, on the other hand, are more flexible and must be cured under a lamp. Gels have a more natural look and a glossier finish than acrylics. Regarding removal, gels may be gentler on the nail as they soak off, whereas acrylics require filing off, which can be more abrasive.
Gel Nail Kits
Gel nail kits typically include everything needed to apply gel nails at home. These kits often contain pre-mixed gel polish, a UV or LED lamp for curing, a base coat, a top coat, and cleansers or removers. Some kits also include tools like brushes, files, and cuticle pushers. They offer a convenient and cost-effective way for enthusiasts to achieve salon-quality gel nails from the comfort of their homes.
Acrylic
 Acrylic is a widely used material in the nail industry for creating robust and durable nail enhancements. It is made by mixing a liquid monomer with a powder polymer, which hardens when exposed to air. Acrylic nails are known for their stiffness and strength, making them suitable for extending nail length and for those with a more active lifestyle.
Acrylic Application
Applying acrylic nails is a multi-step process that requires precision and care. After preparing the natural nail by cleaning and buffing, a nail tip is often used for length, followed by an acrylic mixture. The acrylic is shaped and smoothed before it hardens completely. It can then be filed to the desired shape and finished with nail polish or other decorations. This process requires skill to ensure the acrylic is smooth, has a natural-looking curve, and blends well with the natural nail.
Acrylic Removal
Removing acrylic nails involves a process that should be cautiously undertaken to avoid damaging the natural nails. The process typically involves filing down the top layer of the acrylic and then soaking the nails in acetone to dissolve the remaining acrylic. This can be done using cotton balls soaked in acetone, placed on the nails and wrapped in foil, or soaking the nails directly in a bowl of acetone. After the acrylic has softened, it can be gently scraped off. Post-removal nail care is essential to restore moisture and strength to the natural nails.
Rhinestones
 Rhinestones are small, sparkling embellishments in nail art to add glamour and sophistication. They come in various shapes, sizes, and colours, allowing for versatile design options. Rhinestones can create accent nails, enhance patterns, or form elaborate, jewel-encrusted designs that make a statement.
Rhinestone Designs

Rhinestone designs in nail art can range from subtle to bold. A single rhinestone can be placed at the base of the nail for a touch of elegance, or multiple stones can be used to create intricate patterns such as floral motifs, geometric shapes, or cascading designs. The arrangement of different coloured and sized rhinestones can produce a 3D effect that catches the light and draws attention.
How to Apply Rhinestones
Applying rhinestones to nails requires a few key steps to ensure they adhere properly and last:
- Preparation: Start with a clean, dry nail surface. Apply a base coat or the desired colour of nail polish and let it dry completely.
- Adhesive: Use a small dot of nail glue or clear polish on the spot where the rhinestone will be placed. Nail glue is preferred for long-lasting wear.
- Placement: Pick up the rhinestone with a wax pencil, tweezers, or a dotting tool and carefully place it onto the adhesive. Adjust the stone with the tool as needed before the glue dries.
- Sealing: Once all rhinestones are in place, apply a top coat around (not over) them to seal the edges and further secure them. Applying a top coat over rhinestones can dull their shine.
- Drying: Allow ample time for the adhesive and top coat to dry completely to prevent rhinestones from shifting.
It’s important to work swiftly but carefully for best results and use quality rhinestones and adhesives for nail art.
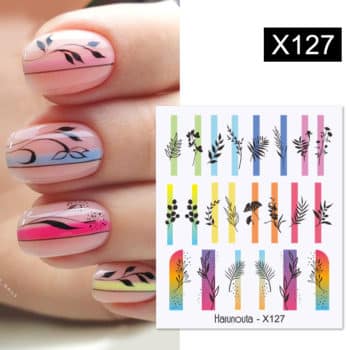
Stickers
 Stickers are a convenient and quick way to add intricate designs and patterns to nails without freehand painting. They are trendy among those who want to achieve detailed nail art quickly at home. Nail stickers come in many designs, from simple shapes and patterns to elaborate, full-nail decals that mimic professional manicures.
Types of Stickers
There are several types of nail stickers available to suit various tastes and styles:
- Decals: Thin designs typically cover the entire nail in various colours and patterns.
- 3D Stickers: These have a raised texture and can include elements like flowers, bows, and other shapes for a three-dimensional effect on the nails.
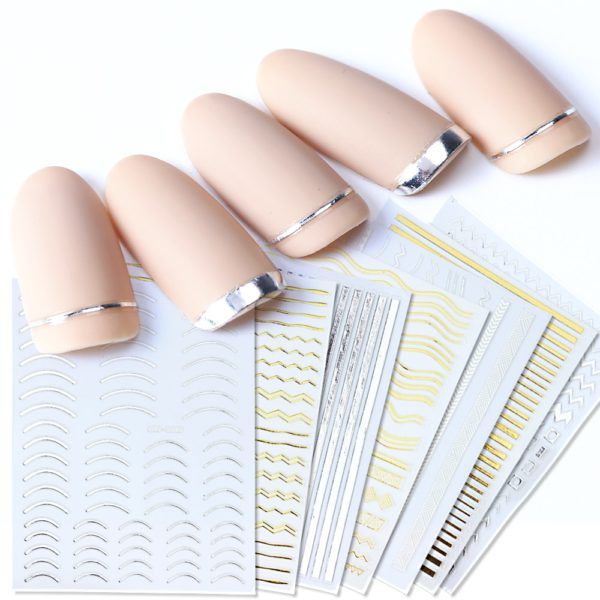
- Metallic and Holographic Stickers: Provide a shiny, reflective finish ranging from gold and silver to holographic rainbows.
- Transfer Stickers: This method involves placing the sticker on the nail and using water or pressure to transfer the design onto the nail surface.
- Vinyl: Used as stencils for painting designs on nails and then peeled off to reveal the pattern.
Sticker Application
To apply nail stickers, follow these steps for the best results:
- Preparation: Start with clean, dry nails. If desired, apply a base coat or a background colour of nail polish and allow it to dry completely.
- Selection: Choose a sticker that fits the size and shape of your nail. If necessary, trim the sticker to fit.
- Placement: Peel the sticker from the backing and carefully place it on the nail. Use a tweezer for a more precise application. Press down firmly to ensure it adheres smoothly without air bubbles or wrinkles.
- Seal: Apply a top coat over the sticker to seal it in place. This also provides a smooth finish and prolongs the longevity of the nail art.
- Drying: Allow the top coat to dry thoroughly to prevent any smudging or displacement of the sticker.
Stickers can be a fun and easy way to add flair to your nails, and with careful application, they can last as long as a regular manicure.
Guide to Nail Art: Tools
Nail File
 A nail file is a tool used to gently grind down and shape the edges of nails. It is an indispensable item in any nail care kit, allowing for precise shaping and a smooth finish. Using a nail file helps prevent nails from splitting or snagging by ensuring a clean, even edge.
Types of Nail Files
Nail files come in a variety of materials and grits suited for different nail types and uses:
- Metal Files: Durable and long-lasting, but may be too harsh for weak or brittle nails.
- Glass Files are gentle on nails. They have a fine grit that seals the keratin layers together at the edge of the nail, which helps prevent splitting.
- Emery Boards: The most common type of file is made of emery paper glued to a cardboard core. It is disposable and comes in various grits.
- Ceramic Files: Similar to glass files, they are gentle and effective for refined shaping.
- Crystal Files: Made from hardened glass, these files are smooth and gentle, suitable for natural and artificial nails.
- Buffer Files: Have different surfaces with varying grits for smoothing and polishing the nail surface.
How to File Nails
To file nails properly, follow these guidelines:
- Choose the Right File: Select a file with the appropriate grit for your nail type. A finer grit is better for natural nails, while a coarser grit may be used for acrylics or gels.
- Clean Nails: Ensure your nails are clean and free of polish. It is best to fit nails when dry since wet nails may tear more easily.
- Filing Technique: Hold the file at a slight angle to the nail’s edge. File in one direction from the outside to the centre of the nail, moving the file smoothly across the tip. Avoid sawing back and forth, as this can damage the nail.
- Shape Nails: Decide on a shape (square, round, almond, etc.) and file accordingly. Be consistent to achieve a uniform look.
- Be Gentle: Use light strokes and do not apply too much pressure to prevent weakening the nail structure.
- Finish: After achieving the desired shape, use a buffer if necessary to smooth the nail edge and surface.
Proper filing is a fundamental aspect of nail care that improves the appearance of nails, promotes their health, and prevents damage.
Cuticle Pusher
A cuticle pusher is a nail tool designed to push back the cuticles, the delicate layers of skin that sit at the nail base. It is a vital tool in manicuring for shaping and cleaning the cuticle area, helping to give nails a neat appearance and prevent the cuticle from overgrowing onto the nail plate.
Cuticle Care
Cuticle care is an essential aspect of nail maintenance that helps to keep nails looking well-groomed and healthy. Proper cuticle care can prevent hangnails, reduce the potential for nail infection, and promote healthier nail growth. It typically involves softening the cuticles, gently pushing them back, and moisturising them to maintain flexibility and prevent cracking or peeling.
How to Use a Cuticle Pusher
Using a cuticle pusher correctly involves several steps to ensure safe and effective cuticle care:
- Softening Cuticles: Apply cuticle remover or cream to the nail base to soften the cuticles. Alternatively, soak your nails in warm water for a few minutes to naturally soften them.
- Choosing a Cuticle Pusher: Select a cuticle pusher that suits your preference, such as a wooden, rubber, or metal one. Some prefer the gentleness of a wooden pusher, while others opt for the precision of a metal one.
- Pushing Back Cuticles: With the pusher, gently push the softened cuticles along the nail bed’s contour. Push only the excess skin that has grown onto the nail plate, and do not force or scrape the living tissue.
- Cleaning: The flat end of a metal cuticle pusher can be used to clean under the nail edge and remove dead skin and buildup.
- Moisturising: After pushing back the cuticles, apply cuticle oil or a hydrating treatment to replenish moisture and keep the cuticles and nails healthy.
- Maintenance: Regular maintenance, such as weekly cuticle care, can keep the cuticles in good condition and enhance the look and health of your nails.
Using a cuticle pusher with care is essential to avoid tearing the skin or causing injury to the cuticle area. A gentle touch and proper technique are crucial to preventing damage while achieving a clean and polished look.
Brushes
 In nail art, brushes are indispensable tools that allow for precision and versatility in design. They come in various shapes and sizes, each tailored to specific techniques and effects. Quality brushes can help achieve everything from flawless polish application to intricate hand-painted designs.
Types of Brushes
Nail art brushes vary greatly to accommodate different design needs:
- Flat Brushes: Used for creating long fluid strokes and for one-stroke designs. They can also be used for applying base colours or for cleanup around the nail.
- Detail Brushes: These have very fine tips and are perfect for painting intricate designs and tiny details.
- Striping Brushes: Long and thin, these brushes are designed to create straight lines and stripes easily.
- Fan Brushes are used to create gradient effects, shade, and sprinkle glitter or other nail art materials onto the nails.
- Angular Brushes: Their angled shape is suitable for precise strokes and for getting into tight spaces around the cuticles.
Brush Care
Proper brush care is essential to maintain the performance and extend the life of your nail art brushes:
- Cleaning: Clean brushes immediately after use to prevent the polish or paint from hardening. Use a nail brush cleaner or gentle soap and warm water for cleaning, depending on the type of paint or polish used.
- Reshaping: After cleaning, reshape the bristles to maintain their form while wet. This is particularly important for detail and striping brushes, where precision is critical.
- Drying: Lay the brushes flat to dry, ensuring that water does not run into the ferrule, as this can loosen the glue over time and cause shedding.
- Storage: Brushes should be stored in a holder or case to protect the bristles from damage. They should also be kept out of direct sunlight and in a cool place to prevent the handles from warping or cracking.
- Conditioning: Conditioning the bristles can occasionally keep them soft and pliable, especially for natural hair brushes. Use a small amount of hair conditioner, rinse thoroughly, and reshape to dry.
Taking good care of nail art brushes ensures they remain in top condition for creating beautiful designs, making them more enjoyable and consistent.
UV Lamp
 A UV lamp is used in nail salons and home manicure setups to cure or harden nail products such as gel polishes, gel builders, and certain types of acrylics. These lamps emit ultraviolet light at a specific wavelength that initiates a reaction in the gel polish, causing it to bond and harden quickly.
UV vs LED Lamps
While both UV and LED lamps serve the same purpose of curing nail products, there are distinct differences between them:
- UV Lamps: These lamps emit a broad spectrum of UV light and can cure all gel polishes. They typically take longer to cure polish, usually around 1-2 minutes.
- LED Lamps: LED technology cures gel polishes faster, often within 30 seconds. However, they emit a narrower spectrum of UV light, which means they may not be compatible with all gel products unless specified by the brand.
When choosing between the two, consider factors like curing time, the type of products used, and the frequency of use. LED lamps offer efficiency and speed, while UV lamps may provide more versatility for different materials.
Safety Tips
When using UV or LED lamps, safety should always be a priority:
- Protect Skin: Apply sunscreen to your hands, or use anti-UV gloves with the fingertips cut out to protect your skin from exposure to UV radiation.
- Avoid Overexposure: Follow the manufacturer’s recommended curing times to avoid overexposure to UV light, which can cause the gel to overheat and potentially burn your skin.
- Proper Use: Only use the lamp for its intended purpose of curing nails. Please do not use it to dry regular nail polish or other non-recommended uses.
- Regular Testing: Ensure your lamp works correctly and the bulbs are effective. UV bulbs need to be replaced periodically as they lose efficacy over time.
- Eye Safety: Never look directly at the UV or LED light, as it can harm your eyes.
- Ventilation: Use the lamp in a well-ventilated area to avoid inhaling any fumes from the nail products.
By adhering to these safety tips, you can enjoy the benefits of quick and durable gel manicures while minimising potential risks associated with UV and LED lamp usage.
Tweezers
Tweezers are a precision tool widely used in nail art for placing and adjusting tiny decorations like rhinestones, stickers, and decals. Their pointed tips allow meticulous placement and control, essential for detailed nail designs.
Types of Tweezers
There are several types of tweezers, each designed for specific tasks in nail art:
- Pointed Tweezers: These sharp, pointed tips are excellent for picking up and placing small, intricate nail decorations.
- Slant-Tip Tweezers: The angled edge of slant-tip tweezers balances precision and ease of use, making them versatile for various nail art tasks.
- Flat-Tip Tweezers: These tweezers have a flat edge and can be used to apply and press down nail wraps or larger decals.
- Curved-Tip Tweezers: The tips are curved upward, which can be particularly helpful for nail art applications where a straight tool might obstruct the view or get in the way.
How to Use Tweezers
To effectively use tweezers in nail art, follow these steps:
- Choose the Right Type: Select the appropriate tweezer type for the task, considering the size and shape of the item you will be placing.
- Clean the Tips: Ensure the tips of the tweezers are clean for the best grip. Any residue can cause slipping or difficulty picking up items.
- Grip the Decoration: Use a gentle grip to pick up the nail art decoration. Applying too much pressure could damage the decoration or make it more challenging to release.
- Place Carefully: Position the decoration on the nail gently. If adhesive is needed, place a dab on the nail first, then set the decoration on top.
- Adjust as Needed: If the placement isn’t perfect on the first try, use the tweezers’ tips to adjust the position before the adhesive sets.
- Clean After Use: Clean your tweezers after each use to keep them in good working condition and prevent cross-contamination.
Proper use and maintenance of tweezers are essential to ensure they remain effective for nail art and to maintain hygiene standards.
Guide to Nail Art: Styles
In nail art, “styles” refer to the distinctive designs and aesthetics that can be created on the nails. These styles can range from the subtle and classic to the bold and avant-garde, offering endless possibilities for personal expression.
French Manicure
 A French manicure is a style characterised by a natural pink base with white tips, which mimic and enhance the natural appearance of the nails. It’s a timeless look suitable for all occasions, from everyday wear to more formal events.
Classic French

The classic French manicure has a sheer pink or beige base with a crisp white tip. The style is renowned for its simplicity and elegance. To achieve this look, white polish is carefully applied to the tips of the nails, often using guides to ensure a clean line, and then completed with a pink or beige polish over the entire nail.
Coloured French
A coloured French manicure follows the same technique as the classic French but with a twist—colour is added. Instead of the traditional white tip, various colours can be used to create the tip, and similarly, the base can be varied with different hues. This style allows for creativity and personalisation, making it a popular choice for those who want to add a modern spin to the traditional French manicure.
Abstract

In nail art, the abstract style represents a departure from conventional designs and patterns. It embraces a more free-form, often spontaneous aesthetic incorporating various colours, shapes, and techniques. Abstract nail art is ideal for those who seek to express their individuality and artistic flair through their manicure.
Abstract Designs
Abstract designs on nails can range from simple brush strokes and splashes of colour to complex, layered compositions. These designs often involve a combination of various nail art techniques, such as marbling, sponging, and freehand painting. The beauty of abstract nail art lies in its unpredictability and the fact that there are no rules. Each nail can feature a unique pattern, making the style highly customisable and creative.
Abstract Art Inspiration
Abstract art, in the broader sense, can serve as a rich source of inspiration for nail designs. Artists like Wassily Kandinsky, Piet Mondrian, and Jackson Pollock, known for their pioneering abstract work, can influence the colour choices, forms, and application methods used in abstract nail art. Inspiration can also come from natural elements, everyday objects, or even emotional states, all translated into abstract patterns and designs on the nails. This style of nail art can be a personal reflection of one’s mood, interests, or fashion sense, making every manicure a unique piece of art.
Floral
 Floral nail art encapsulates designs inspired by flowers’ natural beauty. This style is incredibly versatile, offering an array of creative possibilities, from minimalist representations to intricate botanical illustrations. Floral patterns can be romantic, whimsical, or modern, depending on the execution and colour scheme.
Floral Patterns
Floral patterns in nail art often involve replicating the shapes and forms of various flowers and their leaves. These can range from abstract representations that suggest the essence of florals with simple dots and strokes to detailed depictions that mirror real-life blooms. Techniques such as stamping, stencilling, or freehand painting with fine brushes are commonly used to create these designs. Colours are chosen to reflect the hues of actual flowers or can be stylised for a more artistic or seasonal interpretation.
Seasonal Floral Designs
Seasonal floral designs take inspiration from the flowers that bloom in particular seasons, reflecting the colour palettes and moods of each time of the year. For instance, spring designs may feature pastel tones and soft, delicate blossoms like cherry blossoms or daffodils. Summer might call for vibrant colours and tropical flowers, such as hibiscus or sunflowers. Autumn floral designs could include warmer tones and flowers like chrysanthemums, whereas winter designs might incorporate stark contrasts or white and silver to mimic frosty blooms. Seasonal floral designs can be a way to celebrate the changing beauty of nature at one’s fingertips.
Geometric
 Geometric nail art is characterised by using straight lines, curves, and various shapes to create patterns that range from simple and minimalist to complex and intricate. This style plays with symmetry, asymmetry, and negative space to create visually striking designs that can be both modern and timeless.
Geometric Shapes
Incorporating geometric shapes into nail art involves using figures such as circles, squares, triangles, and polygons. These shapes can be used individually to create a simple, bold statement or combined to create more complex formations. The precision of geometric shapes in nail art requires a steady hand or tools like stencils, stamps, or tape to achieve clean, crisp lines.
Geometric Patterns
Geometric patterns in nail art are created by deliberately repeating geometric shapes, often symmetrically. This can include chevrons, grids, tessellated patterns, and more abstract arrangements. Repeating geometric forms can create a sense of balance and harmony in the nails. Patterns can be executed in monochrome for a subtle effect or with a palette of contrasting colours to make a bold statement. Geometric patterns are versatile and can be adapted to fit any nail shape or length.
Minimalist
 Minimalist nail art embraces the “less is more” philosophy, emphasising simplicity and elegance. Clean lines, simple shapes, and a restrained colour palette define this style. It’s perfect for those who prefer a subtle and refined look or want their nails to complement a range of outfits and occasions without overpowering.
Minimalist Ideas
Ideas for minimalist nail art often involve single dots, delicate lines, negative space, and small, simple shapes. Designs may include a single stripe, a few geometric shapes, or a solitary accent nail. The minimalist approach also embraces the natural nail, often featuring mostly bare nails with small, intentional, and precise accents. This style can also reflect current trends but does so in a toned and tasteful way.
Minimalist Colours
The colour scheme in minimalist nail art tends to be soft and muted, with many whites, nudes, soft pinks, and beiges. Bolder colours are often employed sparingly, as a thin line or a single shape against a neutral background. The palette is usually monochromatic or includes a limited range of harmoniously complementary colours. The focus is on creating a sense of calm and serenity and making the most impact with the least amount of colour.
Occasions
Occasion-based nail art tailors nail designs to suit special events or moments in life, allowing individuals to complement their attire and the event’s theme. It’s a way to celebrate through personal style and add a layer of thoughtfulness to one’s appearance.
Wedding
Wedding nails are an essential part of a bride’s ensemble, designed to enhance the elegance and beauty of the wedding attire.
The nail art for a wedding typically leans towards classic and romantic styles, with a preference for soft, pastel shades and subtle embellishments that align with the wedding’s colour scheme and the bride’s taste.
Wedding Nail Ideas
When considering nail ideas for a wedding, factors such as the wedding dress, theme, and personal style play a significant role. Popular ideas include:
- French Manicure: A timeless choice that exudes sophistication.
- Lace Details: Incorporating lace patterns that mimic the wedding dress or veil.
- Pearls and Rhinestones: Adding delicate pearl accents or rhinestones for a touch of glamour.
- Floral Designs: Soft floral art that complements the bridal bouquet or wedding decor.
- Nude and Neutral Shades: Keeping the nails understated with nude tones enhances the hands’ natural beauty.
Bridal Nail Art
 Bridal nail art matches the wedding theme and reflects the bride’s personality.
While some brides may opt for understated elegance, others might choose more elaborate designs that make a statement.
Bridal nail art can range from simple polishes with a single accent nail to detailed hand-painted designs or 3D nail art incorporating elements like tiny crystals, lace, or metallic foils.
The key is to ensure that the nails look cohesive with the overall bridal look and feel unique and personalised for the big day.
Holidays
Holiday-themed nail art is a fun and festive way to celebrate and express joy during extraordinary times. Each holiday has its own set of themes and colours, giving ample opportunity for creativity and thematic designs that add to the spirit of the occasion.
Christmas Nails
 Christmas nails are typically designed in the traditional season colours: red, green, gold, and white.
Designs often feature motifs such as Christmas trees, Santa Claus, reindeer, snowflakes, and other related symbols.
Glitter and metallic polishes are popular choices to reflect the sparkle of the holiday season.
For a more subtle look, one might choose a deep red or green polish with a hint of shimmer or a simple French manicure with a slight holiday accent, like a holly berry design.
Halloween Nails
 Halloween nails offer a chance to play with bolder and spookier themes.
Typical colours include black, orange, purple, and neon greens. Designs might incorporate ghosts, spiders, bats, skeletons, and other Halloween icons.
This occasion encourages more adventurous and dramatic nail art, including glow-in-the-dark polishes and detailed scenes from horror movies.
Matte top coats can also add to the eerie Halloween effect, providing a different texture to the designs.
Parties
Party nail art is all about making a statement and complementing the energy and excitement of the event. It’s an opportunity to experiment with bold designs and vibrant colours, embodying the spirit of celebration. Party nails can be tailored to match the event’s theme or to stand out as a conversation-starting accessory.
Party Themes
When considering nail art for parties with specific themes, it’s important to incorporate elements that reflect the essence of the theme. For example:
- Glamour Theme: Think metallics, glitter, and crystals to add sparkle and luxury.
- Retro Theme: Choose patterns and colour palettes reminiscent of the era you’re celebrating, such as bold geometric shapes for a ’60s vibe or neon colours for the ’80s.
- Seasonal Theme: Draw inspiration from the time of year, such as pastels for spring or rich, dark tones for winter gatherings.
- Beach Party: Use shades of blue and sandy nudes, perhaps with accents like seashells or palm trees.
Party Nail Art Ideas
When it comes to party nail art, the ideas are as limitless as the types of parties one can attend. Some creative ideas include:
- Accent Nails: Designate one nail (often the ring finger) for a unique accent, like a burst of glitter or a detailed graphic that stands out from a more understated base colour.
- Mix and Match: Combine various finishes and textures, like a matte base with glossy polka dots or stripes.
- Ombre Effect: Create a gradient look that transitions between colours of the party’s colour scheme.
- Thematic Artwork: If the party has a particular motif (like tropical, masquerade, or nautical), incorporate these elements into your nail design.
- Interactive Nails: Use nail art that changes with temperature or light to add a fun and dynamic element to your manicure.
Party nails are an extension of personal style and the joy of the occasion, so having fun with the design is critical. Whether through bright colours, glitter, or thematic artwork, party nail art should be as lively and memorable as the party.
Casual
 Casual nail art is about simplicity and subtlety, suitable for everyday wear.
It focuses on designs that are easy to maintain and versatile enough to complement any outfit or occasion.
The aim is to enhance the nails’ natural beauty without overwhelming them with intricate patterns or bold colours that might be more appropriate for special events.
Everyday Nails
Everyday nail art leans towards a clean, polished look, emphasising natural, muted tones.
A manicure for daily wear might feature a single colour, a French tip with a twist, or a minimalistic design such as tiny dots or stripes.
Using neutral shades like nudes, pinks, light greys, and soft whites helps ensure the nails look well-kept and professional.
Casual Designs
Casual designs for nail art prioritise ease and practicality. This can include:
- Sheer Tints: A wash of sheer colour that evens out the nail’s appearance while keeping the look understated.
- Nude Tones: Use a polish that matches or is close to the skin tone for a refined and elongated nail effect.
- Minimalistic Art: uses small geometric shapes, lines, or negative space designs to add interest without dominating the overall look.
- Textured Polishes: A subtle way to add dimension is to use polishes with fine glitter or a matte finish. These polishes provide a tactile element without flashiness.
- Short and Natural Shapes: Keeping nails trimmed naturally, such as rounded or soft square, for easy maintenance and a universally flattering look.
Casual nail art is not just about the design but also the manicure’s wearability and longevity. It should feel comfortable and unobtrusively enhance one’s style.
Professional
 Professional nail art is designed to align with a workplace environment, balancing elegance with conservatism. This style is ideal for maintaining a polished appearance that is both stylish and work-appropriate, ensuring that nails present a neat image.
Office-appropriate Nails
Office-appropriate nails often feature designs that are understated and sophisticated. The colour palette tends to be neutral or soft pastels, avoiding overly bright or flashy hues. Common choices include:
- Solid Colours: Classic colours like nude, beige, soft pink, or a clean, sheer white can complement any office attire.
- Simple French Manicure: A traditional French manicure offers a clean and professional look.
- Low-key Accent: A subtle accent, such as a single metallic stripe or a small geometric shape at the base of the nail, can add a touch of personality without distraction.
- Glossy or Matte Finishes: A high-gloss finish adds a touch of sophistication, while a matte finish can provide a modern and subtle twist.
Interview Nails
When preparing for an interview, the goal is to have nails that convey a sense of meticulousness and attention to detail. Nail art for interviews should be even more conservative, adhering to the following guidelines:
- Neat and Trimmed: Nails should be well-manicured, clean, and trimmed to a length that doesn’t hinder functionality.
- Neutral Shades: Stick to neutral shades that won’t draw attention away from the conversation, such as taupe, soft grey, or sheer pink.
- Avoid Embellishments: Steer clear of rhinestones, decals, or bright patterns that may be seen as unprofessional.
- Conditioned Cuticles: Healthy, moisturised cuticles are a must, as they reflect overall grooming habits.
Professional and interview nail styles are about presenting oneself in the best possible light. They focus on quality grooming rather than making a bold fashion statement. The key is choosing a manicure that makes you feel confident while adhering to professional norms.
Guide to Nail Art: Nail Care
Nail care encompasses the practices and routines for maintaining nail health and appearance. Proper nail care is fundamental for aesthetics and preventing nail-related problems like breakage, infections, and other conditions affecting nail health.
Nail Health
Maintaining nail health involves several key factors:
- Hydration: Keeping nails hydrated can prevent brittleness and splitting. Regular use of moisturisers can help maintain nail flexibility.
- Protection: Gloves can protect nails from damage when doing household chores, especially those involving water and cleaning agents.
- Diet: A balanced diet rich in vitamins and minerals supports overall health, including your nails.
- Maintenance: Regular trimming and filing can prevent nails from becoming too long, which may lead to breakages.
Nail Strengthening
Nail strengthening is significant for individuals with brittle or weak nails. It can involve:
- Strengthening Treatments: Various nail hardeners and strengtheners on the market can reinforce the nail structure.
- Avoiding Harsh Chemicals: Limiting exposure to harsh chemicals, such as those in some nail polish removers, can prevent nail weakening.
- Proper Filing: Filing nails in one direction and keeping them at a manageable length can help prevent splitting and peeling.
Nail Vitamins
Nail vitamins are nutrients known to support nail health, which may include:
- Biotin: A part of the vitamin B family, biotin has been shown to help strengthen the nail plate.
- Omega-3 Fatty Acids: These healthy fats can keep nails moisturised.
- Protein: Keratin, a protein, is the primary building block of nails, so adequate protein intake is crucial.
Cuticle Care
The cuticle is the protective layer of skin at the base of the nail, and its care is a crucial aspect of nail health:
- Moisturising: Regularly applying moisturiser can keep the cuticle area from becoming dry or cracked.
- Gentle Pushing: Gently pushing back the cuticle with a cuticle pusher can help maintain nail bed health without causing damage.
- Avoid Cutting: Cutting cuticles can lead to infections and should be avoided.
Cuticle Oils
Cuticle oils are designed to hydrate and nourish the cuticle and nail bed. They often contain vitamins and are formulated with oils such as jojoba, almond, and vitamin E, which can penetrate deeply to moisturise effectively.
Cuticle Creams
Cuticle creams are thicker than oils and provide a protective barrier on the skin. They can be especially beneficial during colder months or for individuals with naturally dry skin, as they help to repair and protect the cuticles from environmental damage.
Nail Strengthening
Nail strengthening reinforces the nails to prevent breakage, splitting, and peeling. This is often achieved through specific treatments and practices that improve the integrity and resilience of the nail.
Nail Hardeners
Nail hardeners are specialised treatments formulated to improve nail strength. They typically contain ingredients such as formaldehyde or calcium, which create a rigid shield over the nail, protecting it from damage. Hardeners can be used as a base coat before or alone when applying nail polish. Following the manufacturer’s instructions is essential, as overuse can sometimes make the nails too hard and, therefore, more prone to snapping.
DIY Remedies
There are also various DIY remedies for nail strengthening, which can be made with ingredients found at home:
- Olive Oil Soak: Soaking nails in warm olive oil for 15-20 minutes can help hydrate and strengthen them.
- Lemon Juice Soak: The vitamin C in lemon juice can help to strengthen nails and brighten yellowing nails when used in a soak.
- Biotin-Rich Foods: Incorporating biotin-rich foods like eggs, nuts, and whole grains into your diet can naturally enhance nail strength.
- Tea Tree Oil: Known for its antifungal and antibacterial properties, it can help treat and prevent nail infections that may weaken nails.
While DIY remedies can be effective for maintaining nail strength and health, for persistent problems or those seeking more dramatic results, professional treatments or a dermatologist’s consultation may be necessary.
Guide to Nail Art: Trends
Nail trends are ever-changing, often reflecting broader fashion trends and seasonal shifts. New nail art techniques, innovations in nail polish formulations, and cultural movements can influence these trends, offering fresh and exciting options for nail art enthusiasts.
Seasonal Trends
Seasonal trends in nail art take inspiration from the colours, moods, and themes associated with each season, allowing for a variety of creative interpretations:
- Summer Nails: Summer nail trends often feature bright, vibrant colours that reflect the season’s energy. Popular designs include beach themes, tropical patterns, and floral art. Neon colours, pastel shades, and nautical stripes are also favourites. Glossy and high-shine top coats can mimic the glistening summer water or the clear skies of the season.
- Winter Nails: In contrast, winter nail trends lean towards darker, richer colours like deep blues, greys, and burgundy to mirror the cooler tones of the season. Designs may incorporate glitter and metallic polishes to emulate the sparkle of snow and ice. Winter motifs such as snowflakes, cosy knit patterns, and icy landscapes are commonly used. Matte top coats can offer a subdued, frosty finish that complements the chillier weather.
Embracing seasonal trends in nail art not only celebrates the changing aesthetics of the seasons but also allows individuals to update their looks in a fun and temporary way. Whether it’s summer’s relaxed vibe or the cosy winter atmosphere, seasonal nail trends provide a palette for personal expression.
Celebrity Trends
Celebrity nail art trends are often set by high-profile individuals who showcase their manicures on social media, in interviews, or at public events. Due to the celebrity’s reach and impact on fans and followers, these trends can quickly gain popularity and influence. Celebrity nail trends might include unique colour choices, innovative application techniques, and the incorporation of luxury elements like precious stones or intricate embellishments.
Celebrity Nail Artists
Behind many celebrity nail trends are skilled nail artists who bring their vision and artistry to the forefront. These professionals often gain recognition for their work with celebrities, which can set industry-wide trends. They play a crucial role in creating signature looks for their clients, and their influence is seen in salons worldwide as clients request copies of celebrity nail styles. Celebrity nail artists are known for their precision, creativity, and ability to predict and set trends.
Red Carpet Nails
Red carpet nails are a specific subset of celebrity nail trends that garner attention during award seasons and film premieres. The styles showcased on the red carpet are often glamorous, complementing these events’ high fashion and elegance. Red carpet nails can range from classic and understated to bold and avant-garde, depending on the celebrity’s style and the statement they wish to make. These events often serve as a platform for showcasing new trends in nail art, with celebrities opting for custom designs that later inspire the public and nail artists alike.
Conclusion
 Nail art is “the window to your soul.”
Nail art, in its essence, is a dynamic and personal canvas for self-expression that evolves with time and trends. It’s an art form that allows you to communicate aspects of your personality and style without saying a word. Whether you prefer a minimalist look that speaks to an understated elegance or an elaborate design that showcases your boldness and creativity, the options are limitless.
Our guide to nail art shows how to excel in nail design truly. It’s essential to familiarise yourself with various techniques, from polishing basics to more advanced methods like marbling and stamping. The right tools are just as crucial, enabling precision in every stroke and detail. But your creativity brings nail art to life beyond techniques and tools. It’s about experimenting with colours, shapes, and textures and sometimes stepping out of your comfort zone to create something uniquely you.
As you journey through nail art, take advantage of the resources available. Our detailed guides provide step-by-step instructions to help you replicate the hottest trends, while tutorials offer new techniques and tips to refine your skills. Inspiration posts can spark ideas for your next design, encouraging you to mix and match elements to develop a look that resonates with your taste.
But above all, remember that nail art is more than just a trend—it’s a form of self-care and a creative outlet that should bring you joy. So, as you keep your nails on-trend, ensure they are also kept in top condition. Nourish them with the proper care, and they will continue to be the perfect backdrop for your artistic expression. Let your nails be your statement pieces, showcasing a part of who you are with every gesture you make.
Further reading

Cultural and Traditional Nail Art


Leave a comment