Striping Tape Nail Art Tutorial
Striping Tape Nail Art Tutorial
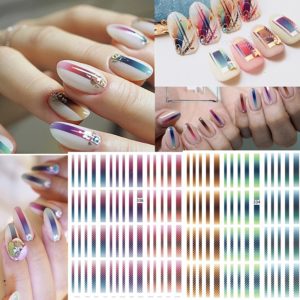
Nail art has evolved into a creative expression, blending technique, precision, and style into personal artistry. Among the myriad techniques available, striping tape nail art stands out for its crisp lines, geometric patterns, and the ability to layer colours for stunning visual effects. This tutorial delves into the striping tape to create sophisticated nail art designs and tips to ensure perfection from base to topcoat.
Equipment You’ll Need

- Striping Tape: Essential for creating clean, precise lines.
- Nail Brush: For detailed application and touch-ups.
- Tweezers: To manipulate and position the striping tape.
- Clippers & Long Nose Scissors: For trimming the tape and nails.
- Nail UV Dryer: Speeds up the drying process, especially useful for gel polishes.
- Nail Gel or Polish: Opt for multiple colours to add depth and contrast to your designs.
Just click on any item you need, and it will take you to its page for purchase.
Step-by-Step Guide
Planning Your Design
- Sketching your idea is essential: Striping tape nail art can range from simple linear patterns to complex geometric designs.
Preparing Your Nails
- Start with Clean Nails: Remove old polish and thoroughly clean your nails.
- Apply Base Coat: Use a UV dryer to quickly dry the base coat. Opt for a lighter colour as your base to enhance the design’s contrast. Apply your base coat evenly, and don’t rush this part. A smooth base is crucial for a flawless finish.
Applying Striping Tape
- Cutting the Tape: Cut strips longer than needed. It’s easier to trim excess tape than to add more.
- Placement: Use tweezers to place the striping tape on your nails. Design your pattern as desired, whether straight lines, geometric shapes, or abstract art.
- Sealing the Edges: Make sure the tape adheres smoothly to avoid polish seeping underneath.
Painting Over Tape
- Colour Application: Apply a darker polish over the base coat and tape. This contrast between light and dark shades accentuates the design.
- Removing the Tape: While the polish is still wet, remove the tape. If your design involves crossed tapes, remove the top layer first. Always pull the tape back in its applied direction (180 degrees) to maintain crisp lines.
Finishing Touches
- Drying: Wait for the nail polish to dry completely before proceeding. Use a nail dryer to speed up the process.
- Topcoat: Apply a topcoat to seal your design, providing a glossy finish and additional protection. If you leave the tape on your nails, the topcoat becomes essential.
Expert Tips for Striping Tape Nail Art
- UV Dryer Usage: A UV dryer is not just for the base coat; it’s equally effective in quickly drying top layers, especially when working with gel polishes.
- Tape Removal Timing: The timing of tape removal is critical. Remove the tape immediately after applying the top colour before it dries to avoid cracking.
- Precision in Tape Removal: Removing the tape along the application line ensures clean, sharp lines. Deviating from this can smear the polish or blur the design.
- Patience Between Layers: Allow each layer to dry thoroughly before adding another. This prevents smudging and ensures the longevity of your nail art.
Conclusion
Striping tape nail art offers endless possibilities to express your creativity and style. Following these steps and tips, you can achieve professional-looking nail art at home. Remember, practice makes perfect, and patience is key to perfecting this art form. Visit our store to get all the tools you need to start your striping tape nail art journey. Happy designing!
The Videos
There is no particular order. Just as I found them on YouTube. The last video is 200 ideas. Watch that.
DOs & DON’Ts: striping tape nail art
Stripping Tape : Tips & Tricks
Tip & Tricks Nail Art Tape
TUTORIAL | HOW TO APPLY STRIPING TAPE (AND LACE GEL) | GEL NAIL ART
HOW I APPLY STRIPING TAPE
Striping Tape Nail Art
Striping Tape Nail Art Tutorial
Striping Tape Tutorial
GEOMETRIC NAIL ART | Easy STRIPING TAPE NAILS for Beginners
100 EASY nail ideas!


Leave a comment