Shop this story
Complete Stamping Kit
Table of Contents
ToggleComplete Stamping Kit: Your Ultimate Guide to Nail Art Perfection
Welcome to the world of nail art stamping, where creativity meets precision to adorn your nails with stunning designs. Whether you’re a seasoned nail artist or a beginner eager to explore our Complete Stamping Kit at NailDitIn.Style is your all-in-one solution to achieve salon-quality nail art at home. Let’s dive into the components of this kit and how they work together to bring your nail art visions to life.
The Essentials of Your Stamping Kit
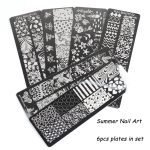
Stamping Plates
- Description: A collection of plates featuring various designs and patterns.
- Use: These plates are your canvas for creativity, allowing you to easily transfer intricate designs onto your nails. From geometric patterns to floral motifs, the possibilities are endless.
Stamping Polish
- Description: Specially formulated, highly pigmented polish available in various colours.
- Use: Designed to ensure that every detail of the design is crisp and vivid, stamping polish is the key to achieving clear, standout designs on your nails.
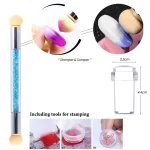
Nail Stamper
- Description: A tool with a soft silicone head.
- Use: The stamper is crucial for precisely picking up the design from the stamping plate and transferring it onto your nail. Its soft silicone head is gentle on the nails yet effective in design pickup.
Scraper
- Description: A thin, flat tool.
- Use: After applying stamping polish to the plate, the scraper removes excess polish, leaving polish only in the design you wish to transfer. This step is vital for a clean stamping process.
Base Coat
- Description: A clear polish that prepares your nails.
- Use: Applying a base coat ensures your nails are smooth and ready for stamping. It also protects your nails from staining and improves the longevity of the nail art.
Top Coat
- Description: Available in clear or matte finishes.
- Use: Once your design is stamped, the top coat seals it, protecting your artwork and adding a glossy or matte finish to your nails. This layer ensures your design stays put for as long as possible.
Cleaning Solution
- Description: Either a nail polish remover or a specialized cleaner.
- Use: Keeping stamping plates and stamper clean is essential for clear designs. The cleaning solution removes old polish, preventing any smudging or mixing of colours.
Cotton Pads
- Description: Soft, absorbent pads.
- Use Perfect for applying the cleaning solution, and cotton pads help clean the stamping plate, stamper, and nails, ensuring a neat nail art process.
Detailed Step-by-Step Guide to Using a Nail Stamping Kit
Nail stamping is a fun and creative way to adorn your nails with intricate designs that would be difficult to achieve with freehand painting. Here’s a detailed, step-by-step guide to using a nail stamping kit, ensuring you get the best results from your nail art endeavours.
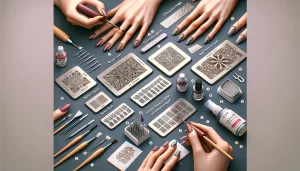
What You Need
- Stamping Plates
- Stamping Polish
- Nail Stamper
- Scraper
- Base Coat
- Top Coat
- Cleaning Solution (nail polish remover or specialized cleaner)
- Cotton Pads
Preparation
- Choose Your Design: Select a stamping plate with the design you wish to transfer. Stamping plates come in various themes and patterns, offering endless creative possibilities.
- Prepare Your Nails: Clean your nails to remove oils or old polish. Apply a base coat to protect your nails and create a smooth surface for stamping. Allow the base coat to dry completely.
 Stamping Process
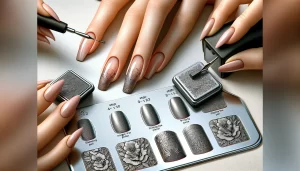
- Apply Stamping Polish: Take your chosen stamping polish and apply a generous amount over the design on the stamping plate. Stamping polish is thicker and more pigmented than regular nail polish, ensuring a clear and vivid design transfer.
- Scrape Excess Polish: Hold the scraper at a 45-degree angle to the stamping plate and swiftly scrape across the design to remove excess polish. This step ensures that polish fills only the design engraved on the plate.
- Pick Up the Design: Press the stamper firmly onto the design. The silicone head of the stamper should pick up the design. Check the stamper head to ensure the design has been fully transferred.
- Stamp the Design onto Your Nail: Carefully align the stamper over your nail and roll it across the surface in a single, smooth motion. Press down lightly but firmly to ensure the entire design transfers onto your nail.
 Post-Stamping
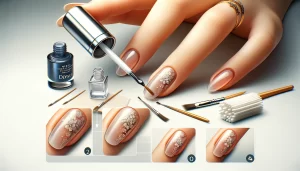
- Apply Top Coat: Once the stamped design is dry, apply a clear top coat to seal the design. This protects your nail art and adds a glossy or matte finish, depending on your preference.
- Clean Up: Use a cotton pad soaked in the cleaning solution to clean up any polish on your skin around the nails. Also, clean your stamping plate, stamper, and scraper with the solution to remove residual polish.
 Tips for Success
- Work Quickly: Stamping polish dries faster than regular polish, so you must work swiftly through the scraping and stamping steps to ensure a clean design transfer.
- Use a Light Touch: When scraping, a light touch is sufficient to remove excess polish without removing too much from the design.
- Practice Alignment: Aligning the stamper correctly over your nail takes practice. Consider practising on paper before moving on to your nails.
- Maintain Your Equipment: Keep your stamping plate and stamper clean and free from polish build-up to ensure crisp designs every time.
 Troubleshooting
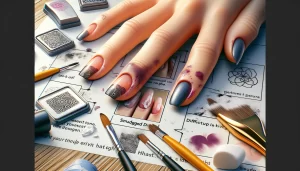
- Incomplete Design Transfer: This can happen if the stamper isn’t pressed evenly onto the plate or nail. Make sure to apply even pressure and check the design on the stamper before transferring.
- Smudged Designs: If the design smudges, it may be because the polish wasn’t dry before applying the top coat. Allow more drying time for the stamped design.
- Difficulty Picking Up Designs: Clean your stamper head with tape to remove lint or oil. Avoid using harsh chemicals that can damage the silicone head.
With practice, nail stamping can become a quick and enjoyable way to create professional-looking nail art at home. This guide should help you easily navigate the process, leading to beautiful, intricate nail designs that showcase your creativity and skill.
Conclusion
Nail art stamping offers creative possibilities with the Complete Stamping Kit from NailDitIn.Style and achieving beautiful, intricate nail designs have never been more accessible. Whether you’re looking to add a touch of elegance to your everyday look or aiming for show-stopping nails for a special occasion, our kit has everything you need. Visit https://nailditin.style/ to explore our range and start your nail art journey today.
Embrace the art of stamping and let your nails be your canvas with NailDitIn. Style’s Complete Stamping Kit.
Some Inspirational Links
YouTube videos

 Stamping Process
 Post-Stamping
 Tips for Success
 Troubleshooting


Leave a comment