Mastering Nail Art: Simple Techniques – Nail Striping
Unveiling the Magic of Nail Striping
Essential Supplies for Nail Striping
Before we embark on our nail striping adventure, gather the necessary supplies:
- Nail Striping Tape or Striping Brushes are the primary tools for creating precise and clean stripes. Nail striping tape creates straight lines, while striping brushes allow for more intricate designs.
- An Assortment of Nail Polish Colours: Choose a selection of nail polish colours that will form the stripes on your nails. These colours should complement your base colour and create stunning contrast.
- A Steady Hand and Patience: As with any nail art, a steady hand is essential for achieving the best results. Patience will also serve you well, especially if you’re new to striping.
Step-by-Step Striping Guide to Nail Striping: Crafting Elegant Stripes on Your Nails
Striping your nails is a form of art that brings a unique blend of elegance and style to your fingertips. This detailed guide will help you master the technique of creating beautiful stripes on your nails.
Step 1: Prepare Your Canvas
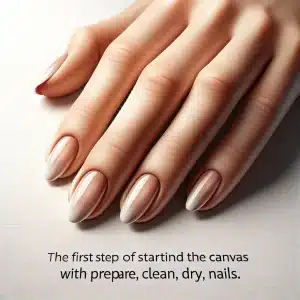 Starting Point: The first step is to prepare your nails. Remove any old nail polish for a fresh start. Use a gentle nail polish remover and ensure your nails are not only clean but also well-shaped and smooth. Remember, a well-prepared nail ensures a flawless finish.
Step 2: Apply the Base Colour
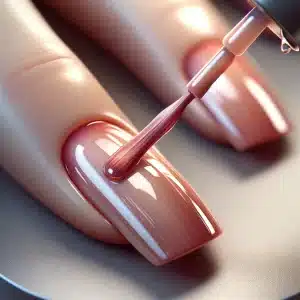 Choosing Your Background: Your base colour is like the foundation of your design. It can be as bold or as subtle as you prefer. Apply it evenly across your nails, ensuring no streaks or bubbles. Let the base colour dry completely, as any wet spots can ruin the stripes.
Step 3: Gather Your Striping Tools
 Tool Selection: The tools you choose can significantly affect the outcome of your design. Nail striping tape is ideal for those who desire perfect, straight lines. It comes in various colours and widths, offering versatility. On the other hand, striping brushes allow for more artistic freedom and are perfect for creating hand-drawn, intricate designs.
Step 4: Create the Stripes
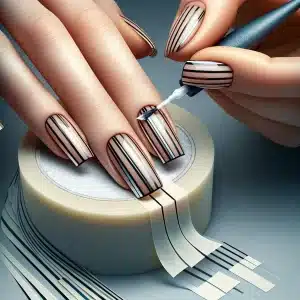 Tape Technique: If you opt for nail striping tape, cut it into thin, manageable lengths. Place the strips carefully on your nail, creating your desired pattern. Ensure they adhere well to avoid polish seeping underneath.
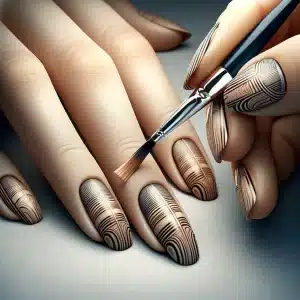 Brush Method: If using a striping brush, dip it lightly into your chosen polish. With a steady hand, draw thin lines across your nail. You can create parallel lines, crisscross patterns, or any abstract design. Remember, the brush allows for a more personalized touch.
Step 5: The Art of Experimentation
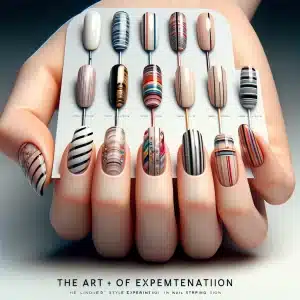 Be Creative: The beauty of nail art lies in experimentation. Mix and match colours, play with different widths, and try various patterns. You can opt for classic black and white stripes, metallic lines for a chic look, or vibrant colours for a more playful vibe. The key is to experiment and find what best reflects your style.
Step 6: Seal Your Masterpiece
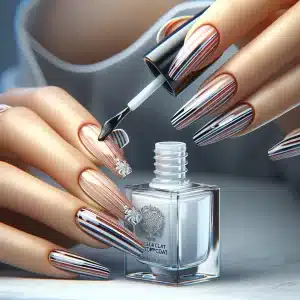 Final Touch: Once you are satisfied with your design, it is crucial to apply a clear topcoat. This enhances the shine of your stripes and seals your design, extending its longevity. A good topcoat prevents chipping and keeps your stripes looking fresh and professional.
Conclusion
Nail striping is a fun, creative way to add sophistication to your look. Whether you prefer sleek, straight lines or playful, intricate designs, the techniques outlined in this guide will help you achieve stunning results. Remember, practice makes perfect; the more you experiment, the more unique your designs will become. Visit NailDitIn.style for more inspiration and tips on nail art. Happy striping!
Images are precious in conveying the striping technique effectively. Here is a collage and a brief description to help you understand the process.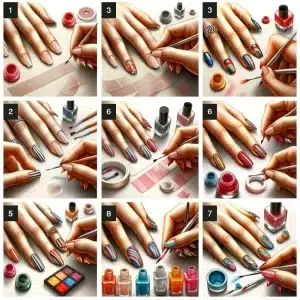
- Image 1: A clean, dry nail as the canvas, ready for striping.
- Image 2: Applying the base colour to the nails and ensuring it’s completely dry.
- Image 3: Preparing nail striping tape or brushes for the design process.
- Image 4: Placing nail striping tape on the nails to create straight and uniform stripes.
- Image 5: Using striping brushes to create intricate stripe designs with various colours.
- Image 6: The final result is beautiful, vibrant stripes on the nails.
- Image 7: Applying a clear topcoat to seal the design and add a glossy finish.
These images will help your readers visualize each step of the striping process, making it easier for them to experiment with their stripe designs and spark their creativity in nail art.
Combining Nail Dotting and Nail Striping
Let’s explore the art of combining dotting and striping in more detail. I’ll provide descriptions and images to illustrate how these two techniques can be harmoniously blended to create stunning nail art.
The true magic of nail art happens when you combine dotting and striping techniques. By combining these two methods, you can create intricate and captivating designs that will leave everyone in awe. The possibilities are endless, and this is your chance to get creative and express your unique style.
Description: Combining dotting and striping allows you to add depth, texture, and visual interest to your nail art. You can use dots to complement your stripes or create entirely new designs. This fusion of techniques offers many possibilities, from elegant and understated to bold and vibrant.
Image Suggestions:
- Image 1: A nail with a base colour and clear examples of dotting and striping techniques.
- Image 2: An image showing how dots can be added to enhance striped patterns on the nails.
- Image 3: This is a visual representation of a nail with a combination of dots and stripes, demonstrating the artistic synergy of these techniques.
- Image 4: A set of nails showcasing combinations of dotting and striping, highlighting the diversity of designs that can be achieved.
These images will help you grasp the concept of combining dotting and striping to create visually stunning and personalized nail art. This technique allows you to unlock your creativity and experiment with endless design possibilities.
Inspiration Galore: Nail Art Ideas
To fuel your creative fire, here are a few nail art ideas to get you started:
- Polka Dot Delight: Combine pastel dots on a white base for a playful look.
- Rainbow Stripes: Use striping to create a vibrant rainbow on your nails.
- Floral Fusion: Dot delicate flowers on a soft, neutral background.
- Classic Striped French Tips: Add elegance with simple black stripes on white tips.
- Galaxy Dreams: Create a cosmic design with dots and stripes in cosmic colours.
Elevating Your Nail Game
Nail art is not just about techniques; it’s about personal expression. Experiment with colours, patterns, and themes that resonate with you. Remember, practice makes perfect. The more you experiment, the more confident you’ll become in creating your unique nail art.
Conclusion
Simple techniques like dotting and striping are the foundations of captivating nail art. They open the door to endless creative possibilities, and they’re a fantastic place to begin, whether you’re just starting out or looking to enhance your nail art skills.
Now, grab your nail tools and start painting your masterpiece. Remember to have fun and embrace your creativity!
More Ideas
Get further inspiration from Reddit – r/Nails One of my favourite places for ideas and trends. Another is Nails Mag and NailDesignsjournal.com

Leave a comment