
Mastering Nail Art: Simple Techniques – Nail Dotting
In nail art, simplicity can be just as captivating as intricate designs. We’ll explore nail dotting, a stunning yet simple technique. This technique is a building block of nail artistry and offers endless possibilities for creating eye-catching nail designs. If you want to up your nail art game, you’re in the right place.
Introduction to Nail Dotting
 Nail art is an expressive and creative way to show off your style. Whether you’re a seasoned nail artist or just starting, nail dotting is essential to master. This uncomplicated yet versatile method can transform your nails into mini canvases for your imagination.
This is the world of nail dotting, and here, you will learn how to create stunning nail art with this technique.
I’ll provide a step-by-step guide and some images to enhance the understanding of this technique.
The Art of Dotting

What You’ll Need
Before we embark on our dotting journey, gather your supplies:
- A Selection of Nail Polish Colours: You’ll need various nail polish colours to create captivating dot designs. Bright, pastel, or vibrant shades—let your creativity shine through.
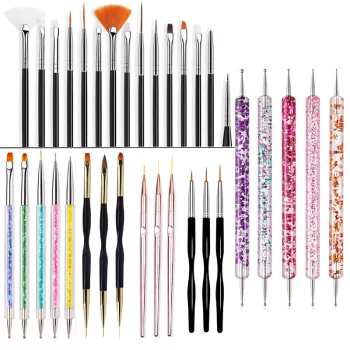
- Dotting Tools with Different-Sized Tips: Dotting tools come in various sizes, from fine to medium. These tools are essential for creating dots of different dimensions. Consider having a few options for versatility.
- A Palette or a Piece of Wax Paper: This is your canvas for mixing and spreading nail polish colours. A palette or wax paper makes accessing the paints and loading your dotting much easier.
- A Steady Hand and a Touch of Creativity: Your steady hand will guide the dotting tool, ensuring precision. Don’t forget to bring your creative flair; the design possibilities are endless!
How to Dot Like a Pro: Mastering the Art of Nail Dotting
 Nail dotting is more than just a beauty routine; it’s a form of self-expression, a small canvas where creativity meets elegance. This comprehensive guide will help you master nail dotting and turn your nails into masterpieces.
Step 1: Prepare Your Canvas

- Clean Slate: Begin with a clean slate. Ensure your nails are free from old polish, trimmed, and shaped to your liking. Clean, dry nails are essential for a smooth application. Use a gentle nail polish remover to clear any remnants of past designs.
Step 2: Apply the Base Colour
- Foundation First: Choosing the right base colour is crucial. It sets the tone for your design. Whether you opt for a bold, bright hue or a subtle, soft shade, ensure the application is even and smooth. Apply two thin coats for better coverage, allowing each coat to dry completely before proceeding.
Step 3: Prepare Your Palette
- Organize Your Colors: Squeeze out small amounts of your desired nail polishes on a palette or a piece of wax paper. Your colours will be ready and accessible, streamlining the dotting process and ensuring a seamless transition between them.
Step 4: Load the Dotting Tool
- Tool Technique: Your magic wand is crucial for perfect dots. Dip the device into your chosen polish, ensuring the tip is evenly coated. If you don’t have a professional dotting tool, a bobby pin or toothpick can be a handy substitute.
Step 5: Create Your Dots
- Dot Dynamics: Now, the fun begins! Gently touch the dotting tool to your nail, creating dots. Play with sizes, colours, and patterns. The possibilities are limitless, from intricate floral designs to minimalist polka dots. Remember, practice makes perfect, so don’t be afraid to experiment.
Step 6: Let the Dots Dry and Seal the Design
- Final Touches: Patience is vital. Let the dots dry completely. Rushing this step can smudge your design. Once dry, apply a clear topcoat. This adds a professional, glossy finish and protects your design, ensuring longevity.
Conclusion
Nail dotting is an enjoyable and creative way to express your style. With these steps, you can create professional-looking nail art right at home. Remember, each dot reflects your creativity, so let your imagination run wild!
A Summary of the Process
- Image 1: A clean, dry nail as the canvas.
- Image 2: Applying the base colour to the nails and letting them dry.
- Image 3: Squeezing various nail polish colours onto a palette or wax paper.
- Image 4: Dipping the dotting tool into a nail polish colour, ensuring an even coat.
- Image 5: Gently press the dotting tool onto the nails to create dots of different sizes.
- Image 6: The final result with colourful and well-distributed dots on the nails.
- Image 7: Applying a clear topcoat to seal the design and add a glossy finish.
 Image 1: A clean, dry nail as the canvas.
Author Bio
As a passionate nail artist and beauty blogger, Mel has been transforming nails into works of art for over a decade. With a keen eye for design and a flair for creativity, Mel believes that beautiful nails are a form of self-care everyone deserves. Through her tutorials, Mel aims to inspire and empower others to express their unique style, one nail at a time.
Inspiration
One of my favourite sources of inspiration is Nails Mag. One of their articles, Patriotic Polka Dots Nail Tutorial, is fascinating.
Elevating Your Nail Game
Nail art is not just about techniques; it’s about personal expression. Experiment with colours, patterns, and themes that resonate with you. Remember, practice makes perfect. The more you experiment, the more confident you’ll become in creating your unique nail art.
YouTube Nail Dotting Tutorials
Further reading


Leave a comment