The Art of Nail Polish: A Comprehensive Guide to Flawless Nail Polish Application
Introduction:
Imagine this: you’re about to step out for an important event.
Your outfit is impeccable, your makeup is flawless, and you notice your nails.
Nothing completes a look quite like a fresh, perfectly applied coat of nail polish.
But achieving that salon-quality finish at home? It’s not always as straightforward as it seems.
In this comprehensive guide, we’ll walk you through everything you need about nail polish application, from choosing the right colour to the secrets of the perfect finish.
So, let’s get on with it and turn those nail polish woes into wows!
Perfecting the Base
Every masterpiece begins with a clean canvas; your nails are no exception.
Applying a base coat is crucial for several reasons: it protects your nails from staining, improves the adhesion of the nail polish, and can even help to strengthen and smooth out any imperfections.
Look for a base coat that suits your nail type, whether you need extra hydration, strength, or ridge filling.
 Choosing Your Colour
Selecting the perfect nail polish colour isn’t just about what catches your eye first.
Consider your skin tone, the occasion, and even the season. Warm, neutral shades may complement a wide range of skin tones, while bold, vibrant colours can excite your look.
Don’t be afraid to experiment, but remember the message you want to convey through your colour choice.
Application Techniques
The key to a smooth, streak-free finish lies in your application technique.
Start with a slight polish on the brush; too much polish can lead to lumpy layers that take forever to dry.
Apply with gentle, sweeping strokes, starting from the base of the nail and moving upwards.
And remember, patience is your friend—allow each coat to dry completely before applying the next.
The Top Coat Secret
The Unsung Hero of Long-lasting Manicures
The top coat might seem like just another layer, but it’s the armour that shields your nail polish from the world.
Its primary role is enhancing durability and providing that glossy shine we all love.
A good top coat can prevent chipping, protect the colour from fading, and even extend the life of your manicure by several days.
In essence, skipping the top coat is like leaving your house in the rain without an umbrella—a surefire way to spoil the effort you’ve put into your nails.
Choosing the Right Top Coat
Not all top coats are created equal, and selecting the right one can make a significant difference in the outcome of your manicure.
Here are a few types to consider:
- Quick-dry top coats: Perfect for those in a hurry, these formulas set your nail polish faster, reducing the dreaded smudging that can happen when you’re too impatient to wait.
- Gel-effect top coats offer a gel manicure’s plump, glossy finish without UV light, providing extra thickness and shine.
- Matte top coats: For those who prefer a non-glossy finish, matte top coats transform any nail polish colour into a flat, matte look, adding a unique touch to your manicure.
- Strengthening top coats: If your nails are prone to breaking or peeling, look for a top coat with added vitamins and minerals to reinforce the strength of your nails.
Application Tips for the Perfect Finish
Achieving that flawless, salon-quality finish requires more than just slapping on a layer of top coat. Follow these tips for the best results:
- Wait for the Right Moment: Ensure your nail polish is almost dry before applying the top coat. If the colour is too wet, it might smudge; if it is too dry, the top coat may not bond as effectively, reducing its protective qualities.
- Thin, Even Layers: Apply the top coat in a thin, even layer. A thick coat can take longer to dry, leading to dents or bubbles. Start from the base of the nail and gently sweep up to the tip with minimal pressure.
- Seal the Edge: Extend the top coat slightly over the tip of the nail to “cap” the edge. This technique helps prevent chipping and ensures a longer-lasting manicure.
- Avoid Quick Fixes: While quick-dry sprays and drops can be tempting, they sometimes cause the top coat to crack or shrink. If using a quick-dry top coat, follow the product’s instructions carefully to avoid compromising the integrity of your manicure.
- Reapply for Longevity: Applying an additional layer of top coat every 2-3 days can significantly extend your manicure’s life, keeping it glossy and fresh.
The Final Touch
The top coat is more than just a protective layer; it’s the finishing touch that combines your manicure, offering protection and polish.
By choosing the right product and applying it carefully, you can achieve a durable, glossy finish that looks professionally done.
Remember, the beauty of a perfect manicure is in the details, and the top coat is a detail that truly matters.
Nail Care Between Polishes
Understanding Nail Health
Before diving into the specifics of nail care, it’s essential to understand that nails reflect your overall health.
Factors such as diet, hydration, and stress can impact their condition.
Thus, a holistic approach to nail care, considering external treatments and internal health, is paramount.
Hydration is Key
Like skin, nails need hydration to stay flexible, strong, and healthy.
Hand cream and cuticle oil can prevent nails from becoming brittle and reduce the risk of hangnails and cuticle damage.
Apply a nourishing cuticle oil nightly to moisturise and encourage healthy nail growth.
Don’t forget to massage hand cream into your nails and cuticles throughout the day, especially after washing your hands.
Give Your Nails a Break
While moving straight from one glamorous nail colour to the next is tempting, giving your nails a breather is essential.
Regular nail polish and remover exposure, especially those containing harsh chemicals like acetone, can dehydrate and weaken your nails over time.
Leave your nails bare for a few days between manicures to allow them to recover.
For extra care, use a nail treatment or a clear, nourishing base coat.
Nail Strengthening Treatments
Incorporate nail strengtheners or treatments into your nail care routine.
Products enriched with keratin, biotin, or other vitamins can help to reinforce nail structure, promoting growth and resilience.
Choose a treatment that addresses your specific nail concerns, whether brittleness, thinning, or slow growth, and apply it regularly during polish-free periods.
Diet and Nail Health
Never underestimate the power of a balanced diet for nail health.
Foods rich in protein, vitamins (especially biotin), minerals, and omega-3 fatty acids can significantly improve the strength and appearance of your nails.
Incorporate a variety of fruits, vegetables, lean proteins, and nuts into your diet to nourish your nails from the inside out.
Gentle Grooming Practices
Proper nail grooming is essential, but it’s crucial to be gentle.
Avoid aggressive filing or cutting back cuticles too far, as these practices can damage the nail bed and lead to infections.
Use a fine-grit nail file to shape your nails with gentle strokes, and opt for a soft cuticle pusher instead of cutting cuticles.
Always trim nails when they are dry to prevent splitting.
Protect Your Nails
Wear gloves to protect your nails when doing household chores, particularly those involving Water or harsh chemicals.
Prolonged exposure to Water can weaken nails, while cleaning agents can strip them of natural oils, leading to dryness and brittleness.
Regular Inspections
Keep an eye on your nails for any signs of trouble, such as discolouration, unusual nail shapes, or signs of fungal infection.
Early detection and treatment can prevent more serious issues and keep your nails healthy and ready for your next polish application.
The Bottom Line
Caring for your nails between polishes is about more than just aesthetics; it’s about health.
Adopting a routine emphasising hydration, protection, and nutrition ensures that your nails remain strong, healthy, and beautiful, ready to be the perfect canvas for your next nail polish masterpiece.
Remember, healthy nails are the foundation of any great manicure, and taking the time to care for them between polishes is the key to maintaining their beauty and integrity.
Common Mistakes to Avoid
Skipping the Base Coat
- Mistake: Many people skip applying a base coat, not realising its importance.
- Why It’s a Mistake: The base coat helps to protect the nail from staining, improves the adherence of the nail polish, and can provide additional benefits like strengthening or smoothing, depending on the formula.
- How to Avoid: Always start with a clean, dry nail and apply a base coat. Let it dry completely before proceeding with your colour coats.
Applying Thick Coats
- Mistake: Apply nail polish in thick layers to get full coverage with fewer coats.
- Why It’s a Mistake: Thick coats of polish are more likely to smudge and take much longer to dry, increasing the likelihood of dents and nicks.
- How to Avoid: Opt for multiple thin coats instead of one or two thick ones. Thin coats dry faster and are less prone to smudging, leading to a smoother finish.
Not Allowing Proper Drying Time
- Mistake: Do not wait long enough between coats or after the final coat before using your hands.
- Why It’s a Mistake: Applying polish over wet layers can lead to smudges and dents. Not allowing the final coat to dry can also ruin your manicure.
- How to Avoid: Be patient. Allow each coat to dry thoroughly before applying the next. After the top coat, wait 5-10 minutes before lightly using your hands; ideally, give it an hour for a complete cure.
Shaking the Nail Polish Bottle
- Mistake: Vigorously shaking the nail polish bottle before application.
- Why It’s a Mistake: Shaking can introduce air bubbles into the polish, which then transfer onto your nails as you paint, creating a bumpy finish.
- How to Avoid: Roll the bottle between your hands to mix the polish instead of shaking. This method helps avoid creating air bubbles.
Cutting or Over-Pushing Cuticles
- Mistake: Aggressively cutting cuticles or pushing them back too hard.
- Why It’s a Mistake: Cuticles protect your nails and surrounding skin from infection. Overzealous cutting or pushing can lead to painful cuts and increase the risk of disease.
- How to Avoid: Gently push back the cuticles after a warm shower or bath, and only trim any dead skin or hangnails with care. Consider using a cuticle remover to soften them, making it easier and safer to push them back.
Using Outdated or Thickened Polish
- Mistake: Using nail polish that has become thick or clumpy over time.
- Why It’s a Mistake: Thickened polish applies unevenly, making it difficult to get a smooth finish. It also takes longer to dry.
- How to Avoid: Keep your nail polish in a cool, dry place to prolong its life. If the polish thickens, consider adding a few drops of nail polish thinner to restore consistency. Avoid using nail polish remover for this purpose, as it can compromise the quality of the polish.
Forgetting the Free Edge
- Mistake: Neglecting to seal the nail’s free edge (the tip) when applying polish.
- Why It’s a Mistake: Unsealed tips are more prone to chipping and peeling, shortening the lifespan of your manicure.
- How to Avoid: When applying each coat of polish (base, colour, and top), ensure you lightly brush the very tip of the nail. This “capping” technique helps protect the tip from wear and tear.
Ignoring Nail Shape and Structure
- Mistake: Apply polish without considering your nails’ natural shape and structure.
- Why It’s a Mistake: Not all nail shapes and lengths handle polish similarly. For example, longer nails might require additional layers for strength, while certain shapes may look better with specific colour choices.
- How to Avoid: Tailor your manicure to your nail shape and length. Use reinforcing base coats for longer nails, and choose colours that complement your nail shape and style.
By avoiding these common mistakes, you’ll improve the appearance of your manicures and the longevity and health of your nails. Remember, the best manicures result from attention.
Nail Art Tips for Beginners
Start with Simple Designs
- Polka Dots: One of the most accessible nail art designs to master is polka dots. Use a dotting tool or the rounded end of a bobby pin to create uniform dots over your base colour. Experiment with different sizes and colours to create various effects.
- Stripes: Use striping or thin painter’s tape for straight lines. Apply your base coat and let it dry completely. Then, place the tape in your desired pattern and apply a contrasting colour over it. Remove the tape while the polish is still wet for crisp lines.
- Colour Blocking: This technique involves painting different sections of your nails in contrasting colours. Use tape to section off parts of your nail, apply the polish, and remove the tape before it dries completely. Playing with geometric shapes and angles can yield exciting results.
Experiment with Tools
- Toothpicks and Bobby Pins: Besides creating dots, toothpicks can draw fine lines or marbling effects. Bobby pins are great for larger dots or creating petal shapes for simple flowers.
- Sponge: A small piece of sponge is your go-to tool for creating ombre nails or a textured look. Apply different colours to the sponge and dab it onto your nails for a gradient effect.
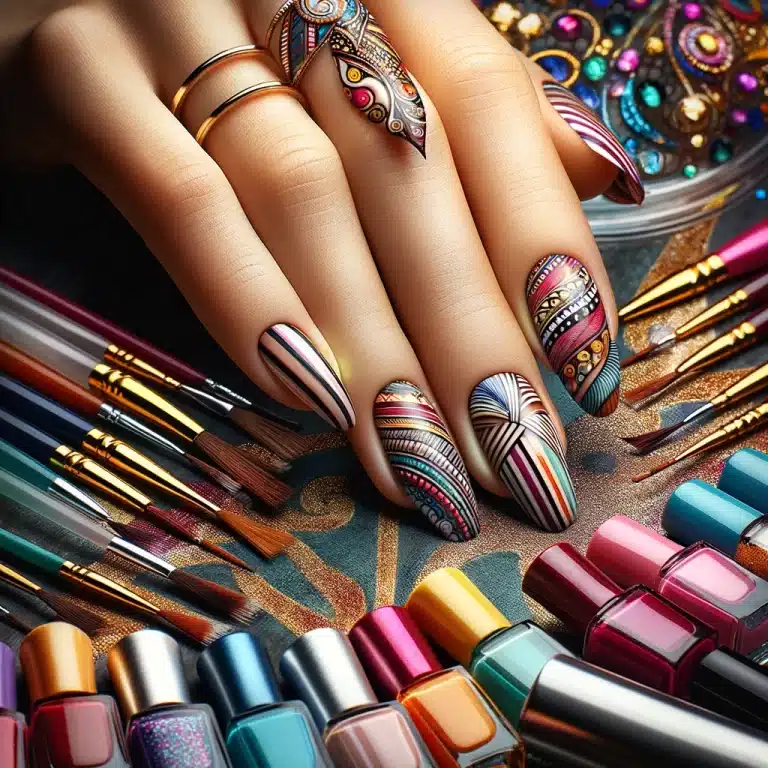
- Brushes: Invest in fine nail art brushes for more detailed work. They can draw intricate designs, from floral motifs to abstract patterns.
Stickers and Decals
- Nail Stickers: For those who are not confident in their freehand skills, stickers and decals are a fantastic option. They come in endless designs and are simple to apply. Place them on dry nail polish and seal with a top coat.
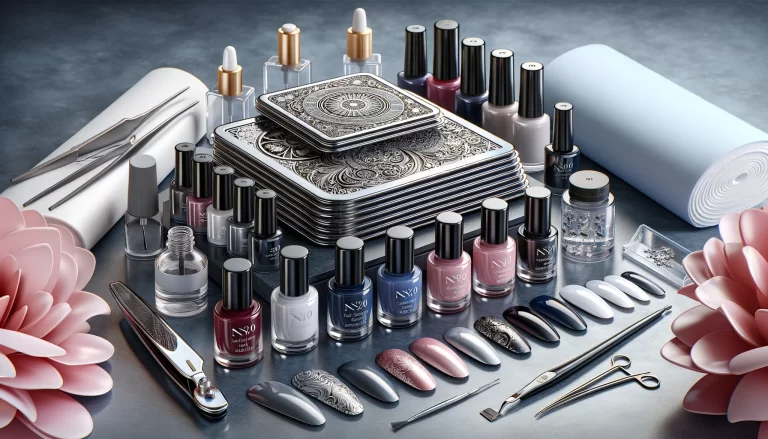
- Stamping Kits: Nail stamping kits allow you to transfer designs from an etched plate to your nails with a stamper. It’s a quick way to achieve detailed patterns that would be difficult to paint by hand.
Use Everyday Items
- Scotch Tape: Besides creating geometric designs, you can use scotch tape to make crisp lines or protect parts of your nails when using spray or sponge techniques.
- Plastic Wrap: Crinkle up a piece of plastic wrap and lightly dab it into nail polish, then onto your nails for a textured, marbled effect.
Practice and Patience
- Trial and Error: Your first attempts at nail art may not be perfect, but practice is vital. Try designs on a nail wheel or paper before attempting them on your nails.
- Patience: Allow each layer of your design to dry thoroughly before moving on to the next step. Rushing through the process can lead to smudges and mistakes.
Top Coat is Essential
- Seal Your Design: Finish your nail art with a clear top coat. This protects your design and adds a beautiful shine that enhances the overall look. Reapply the top coat every few days to keep your nail art looking fresh.
Nail art is a fun way to express your creativity and add an extra touch of style to your manicure. With these beginner-friendly techniques, you can experiment with different designs and colours. Remember, the key to excellent nail art is precision and willingness to try new things and enjoy the process.
DIY Nail Polish Removal
Traditional Nail Polish Remover
- Acetone vs. Non-Acetone Removers: Acetone is highly effective at removing nail polish quickly but can be harsh, causing dryness to nails and cuticles. Non-acetone removers are gentler and usually contain nourishing ingredients but may require more effort and time to remove polish, especially glitter or darker colours.
- Application Tips: To minimise damage, soak a cotton ball or pad with nail polish remover, place it on the nail, and hold it for a few seconds to allow the remover to dissolve the polish. Gently wipe away the polish in a downward motion, from the base of the nail to the tip, to avoid spreading the colour and staining the skin.
DIY Nail Polish Removal Techniques
- Soak and Wrap Method: The soak and wrap method can be more effective for stubborn polish. Soak a cotton ball in nail polish remover, place it on your nail, and wrap the tip of your finger in aluminium foil to hold it in place. After 3-5 minutes, gently twist and pull off the foil and cotton ball. This method helps to break down the polish, making it easier to remove without excessive rubbing.
- Warm Water Soak: If you use a non-acetone remover or have sensitive nails, soaking your hands in warm, soapy Water for a few minutes before removal can help soften the polish. This makes it easier to remove and reduces the amount of solvent needed.
Natural and Gentle Alternatives
- Vinegar and Lemon Juice: A mixture of equal vinegar and lemon juice can be a natural nail polish remover. The acidity helps to break down the polish. Soak a cotton ball in the mixture, apply it to the nail, and hold for a few seconds before gently rubbing the polish off. This method is gentler and more eco-friendly but might take longer and require more effort for certain types of polish.
- Essential Oils: Some essential oils, like lavender or eucalyptus, can help loosen nail polish when mixed with alcohol or vinegar. This method not only helps in removing polish but also nourishes your nails and cuticles.
Aftercare is Essential
- Moisturize: Regardless of the method used, it’s essential to moisturise your nails and cuticles after removing polish. Nail polish remover can dry, so applying a nourishing cuticle oil and hand cream immediately after can help restore moisture and protect your nails.
- Give Your Nails a Break: Allow your nails to rest and breathe for a day or two before applying new polish. This can help prevent staining and maintain nail health.
Precautions
- Avoid Scraping: Never scrape off nail polish using other nails, tools, or harsh methods. This can damage the top layer of your nails, leading to weakness and brittleness.
- Careful with Sensitive Skin: If you have sensitive skin or allergies, test any DIY or natural remover on a small area first. Even natural ingredients can cause reactions in some people.
Following these safe and effective DIY nail polish removal methods ensures your nails remain healthy, strong, and ready for your next manicure. Remember, the key to beautiful nails is the colour and art you apply and how you care for them before, during, and after polish application.
Product Recommendations for the Nail Polish Application Process
Step 1: Nail Cleaners and Prep
- Product Type: Nail Polish Remover or Cleanser
- Purpose: To ensure nails are clean and free of oils or old polish for optimal polish adherence.
- Recommendation: Look for gentle, acetone-free removers that efficiently clear the nail surface without drying it out. For natural options, consider removers infused with aloe vera or vitamin E.
Step 2: Base Coat
- Product Type: Strengthening or Smoothing Base Coat
- Purpose: To protect the nail from staining, fill ridges for a smooth application, and enhance the polish’s adherence to the nail.
- Recommendation: Choose a base coat that addresses specific nail concerns, such as brittleness or ridges. Formulas containing keratin or vitamin E can help strengthen nails, while smoothing base coats can create a perfect canvas for colour.
Step 3: Nail Polish
- Product Type: Long-Lasting Nail Polish
- Purpose: To provide vibrant colour and shine with durability.
- Recommendation: Offer a range of colours from trusted brands known for their long-lasting formulas. Highlight products free from harmful chemicals (like toluene, dibutyl phthalate (DBP), and formaldehyde) and feature quick-drying, chip-resistant properties.
Step 4: Top Coat
- Product Type: Quick-Dry Top Coat or Gel Effect Top Coat
- Purpose: To seal in colour, add shine, and extend the manicure’s life.
- Recommendation: Recommend a top coat that dries quickly to minimise the risk of smudges and offers a gel-like finish without UV light. For extra nourishment, look for top coats with added vitamins.
Step 5: Cuticle Oil and Nail Care
- Product Type: Cuticle Oil
- Purpose: To hydrate and nourish the cuticles and nails, promoting healthy nail growth.
- Recommendation: Suggest natural oil blends with jojoba, almond, and vitamin E. These oils are excellent for keeping cuticles soft and healthy, preventing hangnails and promoting stronger nail growth.
Step 6: Nail Art Tools
- Product Type: Dotting Tools, Brushes, and Stencils
- Purpose: To enable creative nail art designs with precision and ease.
- Recommendation: Offer a variety of tools for beginners and advanced users, such as fine-tip brushes for detailed work, dotting tools for perfect dots and patterns, and stencils or stickers for those new to nail art.
Step 7: Nail Strengthener and Treatment
- Product Type: Nail Strengthener or Treatment
- Purpose: To repair and strengthen natural nails, especially after removing nail polish.
- Recommendation: Recommend treatments that target specific issues like splitting, peeling, or slow growth. Products containing biotin, calcium, or keratin are beneficial for improving nail strength and flexibility.
Enhancing Your Manicure Experience
In addition to the above steps, consider suggesting supplementary products that enhance the manicure experience, such as hand creams, manicure kits (with nail files, clippers, and buffers), and gentle, moisturising hand soaps.
Got a nail polish trick up your sleeve?
Share your magic with our community and inspire others to nail perfection!
Conclusion: Mastering the Art of Nail Polish Application
A Recap of the Journey
We’ve explored nail polish applications comprehensively, delving into the nuances that transform a simple manicure into an art form. Every step is integral to achieving a flawless finish, from preparing the nail bed with a nourishing base coat to selecting the perfect colour that reflects your mood and style. We’ve uncovered the secrets behind applying thin, even coats, the magic of the top coat in sealing and protecting our masterpiece, and the essential aftercare that keeps our nails healthy and vibrant.
The Importance of Technique
Mastering nail polish application is more than just a beauty routine; it’s an expression of self-care and personal style. The precision and patience required in each step reflect a dedication to craftsmanship and detail. By avoiding common pitfalls like skipping the base coat or applying polish too hastily, we ensure our nails look stunning and are cared for properly.
The Role of Creativity and Community
Nail art invites us to unleash our creativity, offering a canvas as small yet boundless as our imagination. Sharing tips, tricks, and designs with the community doesn’t just enhance our skills—it fosters collective growth and inspiration that enriches the entire nail art culture.
Lifelong Learning and Enjoyment
The journey to mastering nail polish application is ongoing. With every brush stroke, we learn more about our preferences, techniques, and the ever-evolving trends in nail art. This process is not just about the result but the joy and relaxation of the act itself.
Call to Action Reiterated
As we wrap up, remember that your experiences, challenges, and triumphs in nail polish application are invaluable. Share your journey, ask questions, and connect with others who share your passion. Together, let’s continue to elevate the art of nail polish application, making every manicure an opportunity for expression, innovation, and connection.
The Final Brushstroke
In mastering nail polish application, we embrace beauty, precision, and self-expression. The techniques and tips shared here are your tools for turning simple nail polish into an extraordinary extension of your style. As you refine your skills, remember that each nail is a small canvas awaiting your unique touch. So, pick up your brush, choose your palette, and let the transformation begin.
Some Inspirational Sites
- How to Remove Gel Nail Polish at Home Safely by Elle Magazine
- The Best Neutral Nail Polish Colors to Buy Now for a Chic, Minimalist Look
Author Bio: Your Nail Care Enthusiast
Introduction to the Expert
Meet Heather, a dedicated nail care enthusiast and beauty expert with over 20 years of experience in the nail art and cosmetics industry. Heather’s journey into the world of beauty began at a young age, inspired by the transformative power of a simple manicure. What started as a passion for nail polish and design quickly evolved into a professional quest to share this art with others.
Credentials and Experience
Heather has honed her craft through professional training, attending numerous beauty workshops, and achieving certifications from renowned beauty institutions. With a deep understanding of nail health, aesthetics, and the latest trends in nail art, Heather has become a sought-after voice in the beauty community. Their work has been featured in several beauty magazines and online platforms, where they’ve shared insights on everything from nail care basics to advanced nail art techniques.
Philosophy and Approach
Believing that every individual has a unique beauty that shines brightest with the proper care, Heather approaches nail art as a form of self-expression and empowerment. They advocate for using nail care as a means of self-care, emphasising the importance of maintaining healthy nails as the foundation of any stunning manicure. Heather’s philosophy extends beyond the aesthetic, focusing on the health and well-being of the nails and the person behind them.
Engagement and Community
Heather is not just about creating beautiful nails; they’re about building a community. Through their blog, social media channels, and public speaking engagements, they encourage open dialogue, sharing tips, answering questions, and celebrating the creativity of nail artists at all levels. Heather is deeply committed to inspiring others to explore their nail art journey, offering guidance, encouragement, and a platform for expression.
Personal Touch
When not experimenting with the latest nail art trends or researching new nail care techniques, Heather enjoys road running, trail running, mountain biking, and more traditional activities such as cooking, further reflecting their belief in a balanced and vibrant lifestyle. Her motto, “Nails are the window to your soul,” encapsulates her approach to life and nail care—highlighting the importance of expressing yourself via your nails.
Connect with Heather
To learn more about [Your Name]’s work, follow them on Facebook or visit their website at Nail’d It in Style whether you’re seeking nail care advice or inspiration or want to say hello, Heather is always eager to connect with fellow beauty enthusiasts and help bring more colour and confidence into the world, one manicure at a time.

Leave a comment