DIY Nail Art Designs
In the vibrant world of nail art, embracing DIY nail art designs offers a creative outlet for expression right at your fingertips. With the ever-evolving trends of 2024, Nail’d It in Style emerges as your go-to destination for transforming your nail game from the comfort of your home. This article delves into step-by-step guides on various nail art designs suitable for all skill levels, ensuring your nails are always in vogue.
Creativity knows no bounds, and every nail represents an opportunity to express your unique style. At Nail’d It In Style, we believe that stunning nail art shouldn’t just be reserved for the salon. With our step-by-step guides, anyone, regardless of skill level, can create beautiful, salon-worthy designs from home.
Key Takeaways
| Trend | Description | Why It’s Hot in 2024 |
|---|---|---|
| Geometric Designs | Precision lines and shapes | Modern and Minimalist Aesthetic |
| Floral Patterns | Delicate flowers and leaves | Timeless Elegance |
| Abstract Art | Bold colours and patterns | Expressive and Unique |
| Glitter and Metallics | Shiny, eye-catching finishes | Glamorous and Festive |
| Start Simple | Begin with easy designs and gradually move to more complex ones. | |
| Quality Tools | Use professional-grade tools for the best results. | |
| Practice Makes Perfect | Don’t be discouraged by initial mistakes; practice is key. | |
| Top Coat Is a Must | Always seal your designs with a top coat for longevity. |
Geometric Elegance
The allure of geometric nail art lies in its clean lines and shapes, offering a sleek, modern look. Nail’d it in Style’s Geometry Nail Stamping Plates are perfect for achieving precise designs with minimal effort. Pair them with Double Ended Gradient Shading Pen for a multi-tonal effect that adds depth to your geometric patterns.
 Floral Fantasy
 Floral Fantasy
Floral designs never go out of style, and with Nail’d It in Style’s extensive range, you can quickly bring a touch of nature to your nails. The Black and White Flowers and Grass Nail Art decal offers a monochromatic twist on traditional floral patterns, perfect for any season. Enhance the look with a splash of colour using Rosalind Neon Hybrid Gel Polish to make your designs pop.
Abstract Adventures
Abstract art in nail designs allows for unlimited creativity, mixing colours and patterns for a truly unique look. The Colourful Abstract Nail Art stickers are a quick and easy way to start. Combine them with the Nail Art Graffiti Pen for added detail and personalization.
 Glitter and Glam
 Glitter and Glam
Glitter and metallics are a must-try for those looking to add a bit of sparkle to their lives. The Holographic Butterfly-Shaped Nail Glitter and Lilycute Gold Metallic Painting Liner Gel Nail Polish from Nail’d It In Style can transform your nails into a dazzling display of light and colour.
The Essentials For DIY Nail Art Designs: Gathering Your Nail Art Kit
 The Essentials For DIY Nail Art Designs: Gathering Your Nail Art Kit
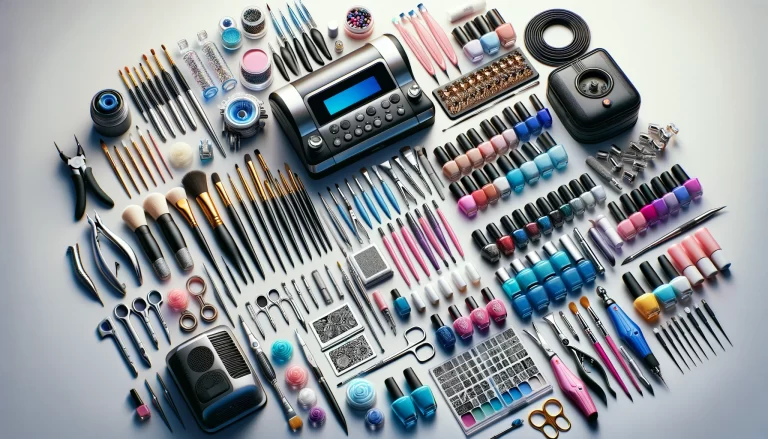
Before diving into the mesmerizing world of DIY nail art, ensuring you have the right tools is crucial. A well-equipped nail art kit is the foundation of creating eye-catching designs. Here’s what you’ll need:
- Professional Nail Art Brushes and Dotting Tools: Precision is vital in nail art. Our 5-20 Piece Nail Art Brush Set and 5-Piece Elegant Dual-Ended Nail Art Dotting Pen Set offer the versatility and accuracy required for intricate designs.
- High-Quality Polishes and Gels: The base of any nail art, our Lilycute Fluorescent Matte Gel Nail Polish offers vibrant colours that last.
- Decals and Stickers: For those who want gorgeous nails without the wait, our Summer Nail Art Rhinestones and Ocean Charms instantly upgrade any look.
- A Steady Hand and Creativity: Perhaps the most crucial tools in your arsenal. With patience and creativity, the possibilities are endless.
Step 1: Prepping Your Canvas
Great nail art starts with properly prepped nails. Begin by cleaning and shaping your nails to your desired length and shape. Our Electric Manicure Nail Drill can help create the perfect canvas for your artistry.
Step 2: Base Coat Application
Applying a base coat such as our Rosalind Top and Base Coat Gel Polish protects your nails and ensures a smooth surface for your designs.
Step 3: Let Your Creativity Flow – Design Time
Once your base coat is dry, it’s time to unleash your creativity. If you’re new to nail art, start with simple designs like polka dots, stripes, or basic geometric shapes. Use our Double-Ended Gradient Shading Pen for seamless blends or our Nail Art Graffiti Pen for intricate doodles and designs. Remember, nail art is about expressing yourself, so there are no mistakes, only learning experiences.
Step 4: A Steady Hand and Creativity
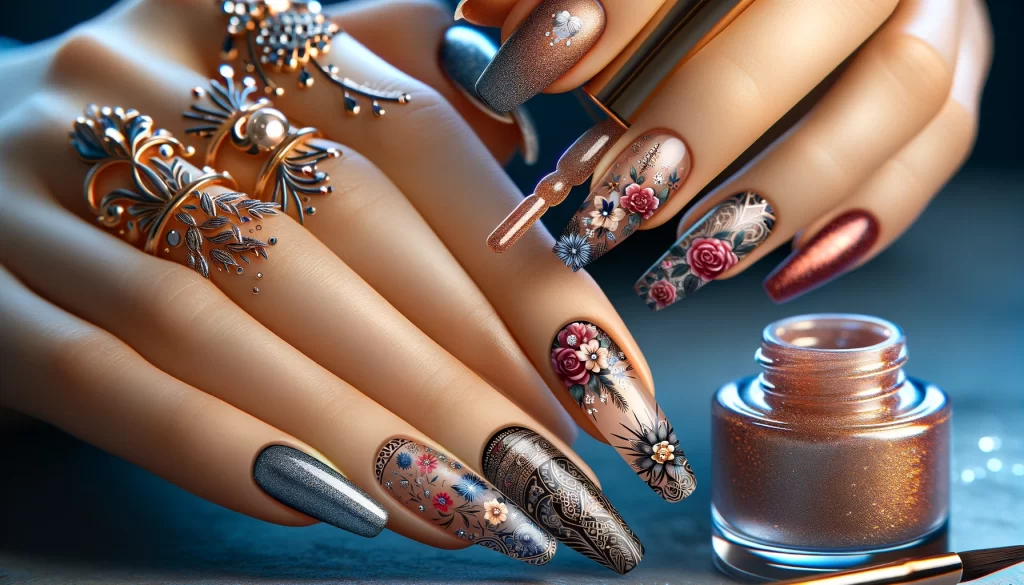
Not everyone has a steady hand or the patience for detailed nail art, and that’s perfectly okay! Our collection of nail decals and stickers offers a quick and effortless way to add flair to your nails. For a touch of elegance, apply our Gold and White Bronzing Leaves Sliders, or for a more whimsical look, our Blue Butterfly 3D Nail Stickers are a fantastic choice.
Step 5: Sealing the Deal – Top Coat Application
The final step in your DIY nail art journey is to seal your design with a top coat. This adds a glossy finish and protects your artwork, ensuring it lasts as long as possible. Our UV Nail Lamp is perfect for curing gel top coats quickly and efficiently.
Tips for Success in DIY Nail Art Design
 Tips for Success in DIY Nail Art Design
- Patience is Key: Allow each layer to dry completely before moving on to the next step to avoid smudges and nicks.
- Experiment with Textures: Incorporate different textures into your designs for added interest. Our Multicolor Holographic Neon Nail Powder can add a dazzling effect to any colour.
- Practice on Nail Wheels: Before committing a design to your nails, practice on nail wheels to perfect your technique.
- Stay Inspired: Follow nail art trends and tutorials to keep your designs fresh and exciting. Your next masterpiece could be just a tutorial away!
In conclusion, DIY nail art is an enriching way to express your style and unleash your inner artist. You can create stunning designs that reflect your unique personality with the right tools and practice. Remember, the journey to becoming a nail art fan is a marathon, not a sprint, so enjoy each step of the creative process.
DIY Nail Art Design Idea
As we explore DIY Nail Art Designs, let’s delve into some specific design ideas you can try at home. These designs are selected for simplicity and visual appeal, making them perfect for beginners and seasoned artists.
Design Idea 1: The Classic French Manicure with a Twist
 Design Idea 1: The Classic French Manicure with a Twist
A timeless look that’s evolved over the years, the French manicure can be easily adapted for a fresh, modern twist. Instead of traditional white tips, why not explore colourful tips or even a glitter gradient? Our Gold French Nails Tip Stickers can add a luxurious touch to your manicure, offering an elegant yet simple way to elevate the classic design.
Design Idea 2: Geometric Patterns
 Design Idea 2: Geometric Patterns
Geometric patterns offer endless possibilities, from simple lines to intricate shapes. Utilize tape or our Geometry Nail Stamping Plates for precise, clean lines and shapes. Mix and match colours for a vibrant, eye-catching look, or keep it monochromatic for a sleek, sophisticated style.
Design Idea 3: Marble Effect
 Design Idea 3: Marble Effect
The marble effect is a stunning design that mimics the look of marble stone on your nails. Achieve this look by swirling together two or more polished colours with a toothpick on a base coat before it dries. For added convenience, our Summer Tropical Beach Nail Stickers offer a pre-designed option that captures the essence of the marble effect with the ease of a sticker.
Design Idea 4: Negative Space Art
 Design Idea 4: Negative Space Art
Negative space designs, where your natural nail peeks through the art, create a sophisticated and modern look. Use our Silicone Nail Stamper and Scraper Plates to stamp designs selectively, leaving parts of the nail uncovered for a chic, minimalistic style.
Caring for Your DIY Nail Art Designs
Maintaining your DIY nail art is just as important as the application process. Here are a few tips to ensure your designs stay beautiful for longer:
- Wear Gloves for Chores: Protect your nails when doing household chores, especially with water or harsh chemicals.
- Moisturize Regularly: Keep your hands and cuticles moisturized. Healthy nails are the best canvas for art. Our Born Pretty Nail Cuticle Tools can help keep your cuticles in perfect condition.
- Touch-Ups: Have your polish on hand for quick touch-ups if your design chips or wears at the edges.
Nail art is a delightful way to showcase your creativity and personality. You can achieve professional-looking nail art at home with practice, patience, and the right tools from Nail’d It In Style. Remember, the beauty of DIY is in the process as much as the outcome. Experiment, have fun, and don’t be afraid to express your unique style through your nails.
At the end of the DIY Nail Art Designs post, let’s focus on advancing your skills and exploring the endless possibilities of nail art. You’ve got the basics down and experimented with a few designs by now. It’s time to elevate your artistry and try more complex techniques to make your nails stand out.
Advanced Technique DIY Nail Art Designs
Advanced Technique 1: 3D Nail Art
 Advanced Technique 1: 3D Nail Art
3D nail art adds an exciting element of texture and depth to your nails. You can achieve this look by applying tiny beads, Rhinestone Crystal Glitter Nail Art Wheel embellishments, or even tiny sculptures to your nails. Use a strong adhesive like our Born Pretty 10g Nail Rhinestone Adhesive to ensure your 3D elements stay secure.
Advanced Technique 2: Airbrushing
 Advanced Technique 2: Airbrushing
Airbrushing allows you to create gradients, ombre effects, and intricate designs with a smooth finish that’s hard to achieve with regular brushes. While specialized equipment is required, the results can be stunning, offering your nail art a professional and bespoke finish.
Advanced Technique 3: Nail Stamping Over Gel
 Advanced Technique 3: Nail Stamping Over Gel
Nail stamping over gel polish combines the ease of stamping with the durability and shine of gel polish. After applying your gel polish and curing it under a UV lamp, apply stamping polish to your chosen design plate, scrape off the excess, and stamp the design onto your gel base. Seal it with a topcoat for a long-lasting look. Our LED UV Nail Lamp is perfect for curing the base gel and the topcoat, ensuring your stamped design lasts as long as possible.
Continuously Explore and Learn DIY Nail Art Designs
The world of nail art is ever-evolving, with new styles, techniques, and products continually emerging. Stay inspired by following nail art influencers, attending workshops, and practising regularly. Remember, every nail artist was once a beginner, and the key to mastery is persistence, patience, and passion.
Wrapping It Up: Your Nail Art Journey
 Wrapping It Up: Your Nail Art Journey
You’ve embarked on a journey through DIY nail art, from gathering your essential tools to mastering advanced techniques. Nail art is more than just a beauty trend; it’s a form of self-expression and creativity. With each design, you tell a story, share a mood, or celebrate an occasion. At Nail’d It In Style, we’re thrilled to support your journey with our wide range of products designed to inspire and enhance your nail art creations.
Thank you for exploring the art of nail design with us. Remember, your imagination is the only limit. So dive in, experiment with different techniques, and most importantly, have fun with your nail art creations. Your nails are your canvas, and the world is waiting to see your masterpieces.
Some Inspirational Links
Remember, “Your nails are the window to your soul.”
 Remember, “Your nails are the window to your soul.”
Further reading

8 Nail Art Techniques and Tips
Cultural and Traditional Nail Art
Leave a comment